Installing and Configuring the Wordfence WordPress Security Plugin
Tuesday 23 June 2015, by Lewis Swift

Jump to:
WordPress security is an important issue to consider carefully.
If you don't use an effective security plugin, your site will be vulnerable to all kinds of malicious attacks. (Click here to read our full article about WordPress security, which covers the different types of attacks your site might suffer.)
In this article, we're going to thoroughly investigate the Wordfence security plugin. We'll look at all of its settings and how to configure them correctly for your site.
It's a richly-featured plugin, which means the initial setup time can be up to 30 minutes if you're new to it.
But don't worry—this article will take you through every single individual step, even if you're new to Wordfence and/or WordPress.
Please make sure to leave a comment if you have any questions about this article or the Wordfence plugin.
Step One: Installing Wordfence
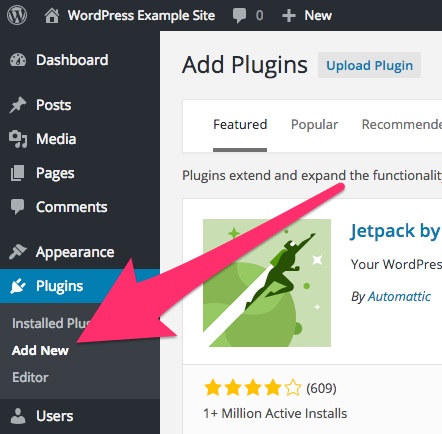
- After logging into your WordPress website (by visiting
www.yourdomain.com/wp-admin/), go to the 'Add Plugins' area
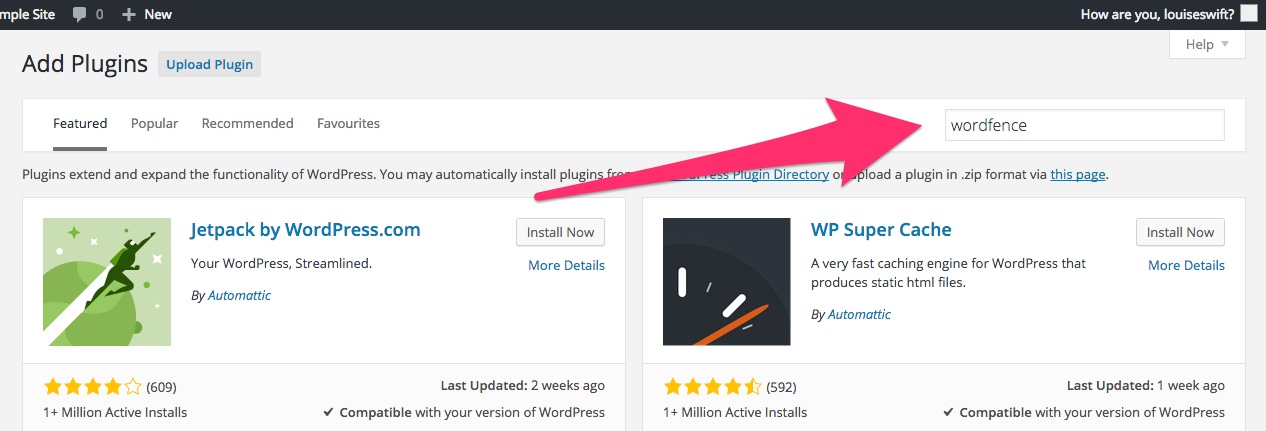
- Here, type 'wordfence' into the search box in the top-right corner and then press the 'Enter' key on your keyboard
- You will likely see many search results appear, but the top-left search result should be the Wordfence plugin itself
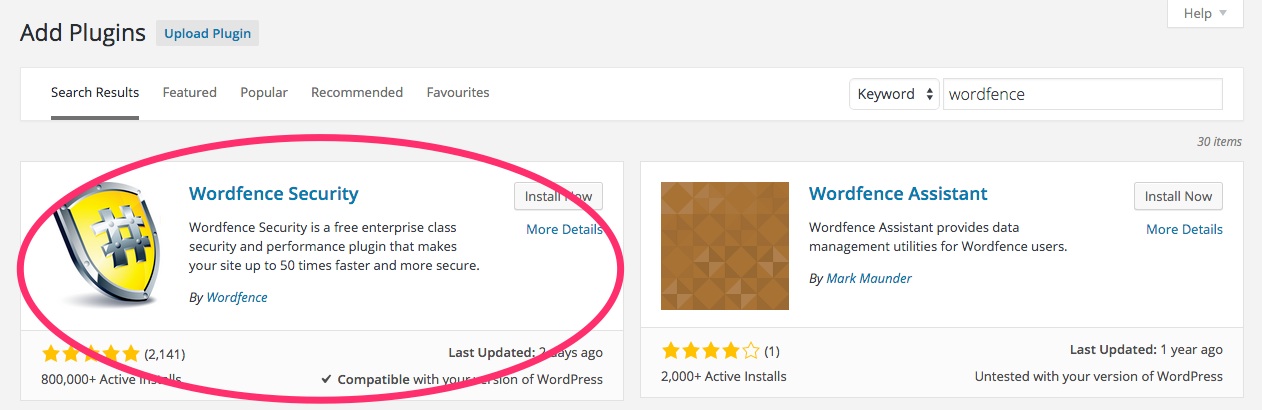
- Click the 'Install Now' button shown in the screenshot above (partly covered by the pink circle line), and wait a few moments for the install to complete
- Once you see the 'Successfully installed the plugin Wordfence Security [version number]' message, click the blue 'Activate Plugin link beneath it
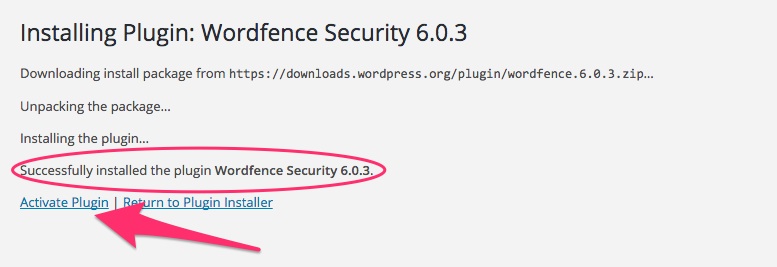
- You'll then be taken to the Plugins list view in your WordPress admin area, where you can confirm that Wordfence has been installed and activated—and you might also see a pop-up from Wordfence confirming the same thing
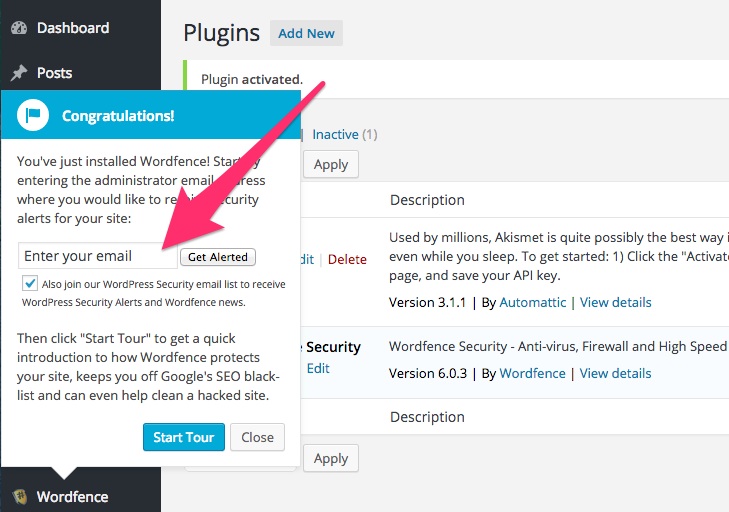
This pop-up confirmation message may include a signup box where you can enter your email address to receive alerts about your WordPress website's security issues. It's a good idea to enter your email address here. Wordfence's email alerts are very helpful.
You might also see a checkbox that allows you to register for email updates from the Wordfence development team. If this is something you would find interesting, you can leave the checkbox checked. Or, if not, you can uncheck the box.
Next, you'll see a blue 'Start Tour' button, which will take you through a tour of Wordfence's features. If you have time and curiosity, you can go through the tour. Alternatively, click the 'Close' button here and follow the steps below to quickly get Wordfence configured for your site.
Note: Wordfence is a free plugin, but the developers offer various additional features to those who pay to upgrade the plugin. This is not necessary for most WordPress website owners, so all of the features and options mentioned below will be free features.
Step Two: Wordfence Options
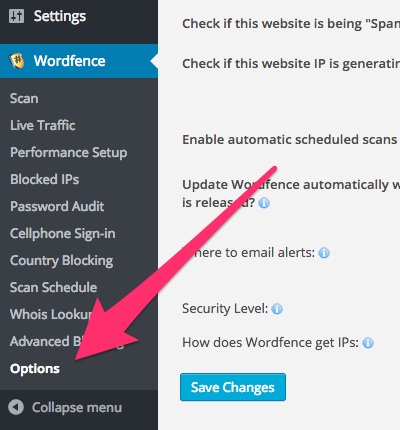
The first place to start is in Wordfence's 'Options' area.
Hover over the new 'Wordfence' item in your WordPress admin area's main left-hand menu, and select 'Options' from the sub-menu that appears.
We can leave most of these options at their default setting for now. As we scroll down through this Options page, we will see the areas where these options can be customised in detail.
As mentioned, we will also be skipping past any 'Premium Features', as these require paying to upgrade the Wordfence plugin. But this is not necessary for most WordPress website owners.
If you do choose to upgrade the plugin, you can find a link to do so at the top of this Options area:
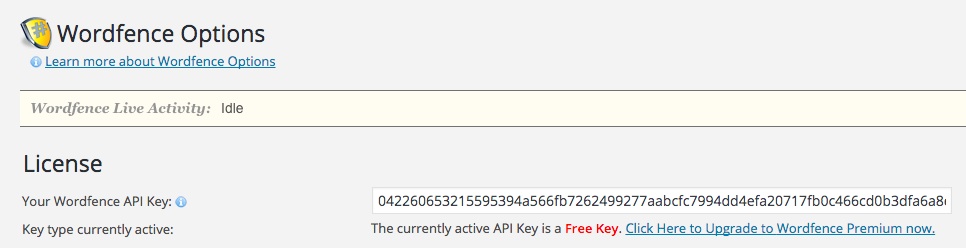
But this is something you can decide about later, after evaluating the Wordfence plugin's usefulness and deciding whether the free features provide robust enough security for your site.
Next, we can scroll past about half of the 'Basic Options' list. These default settings are fine for now, and shortly we will scroll further down the page to see how to customise them in detail (if needed).
However, we do want to look at the last few options in the 'Basic Options' list:
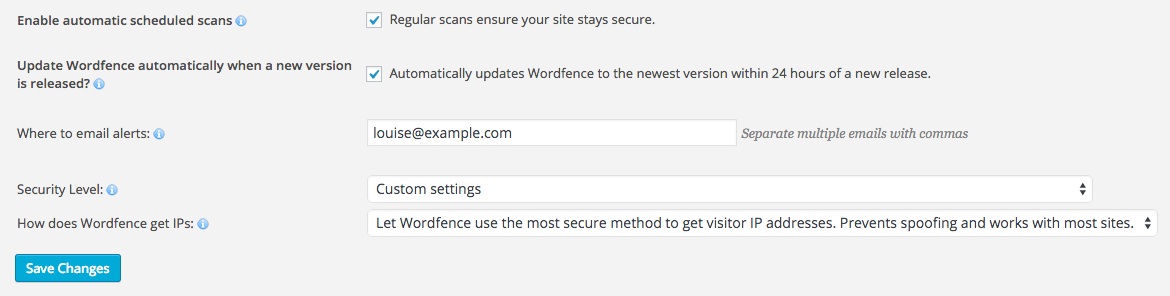
First of all, we see the checkbox for enabling regular automatic website scans. Make sure this checkbox is ticked so that your website can benefit from these regular scans.
Next, we see the checkbox for enabling automatic Wordfence upgrades. Some people might know that they login to their site daily, or multiple times per day, so they might feel more comfortable installing Wordfence's upgrades manually.
But if you don't log into your site that often, it's a good idea to enable Wordfence's automatic updates. Wordfence is regularly upgraded to be able to battle new security threats. So the upgrades are very important.
Next, we see the field where we can enter an email address to receive Wordfence's security alerts. While some of these alerts will be minor (informing you about plugins that need upgrading, for example), some might be very important.
The main reason why I find these email alerts useful is in the rare case that a hacker successfully accesses my site's files. I'll receive an alert about changes being made to the files, which will give me a strong indication of when the hack happened. Then I can use my backup plugin to restore a clean set of backup files, saved before the hack happened.
Finally, in this 'Basic Options' list, we see two dropdown menus.
The first is for very quickly selecting one of five default security levels. This is handy if you discover your site is being targeted by a serious hacking attempt—you could quickly select the 'Level 4: Lockdown' option to protect your site.
Or, if you don't have time to continue examining all of the Wordfence options in detail now, you could select 'Level 2: Medium protection'. This would automatically apply the default settings that are suitable for the majority of WordPress sites.
However, if you have already updated the settings as recommended in this article so far, you will see that 'Custom settings' is selected here. If so, leave this setting as it is and continue to the next dropdown.
The final dropdown allows us to choose how Wordfence gets IP addresses to block attacks. These options are for advanced web users; you'll know if you have set up CloudFlare or a front-end proxy, so you can ignore this dropdown if you haven't done these things.
Don't skip the blue Save Changes button here. Click it now to save your changes so far, and remember to return here to save any other changes you make on this Options page.
Step Three: Advanced Options
The Advanced Options can be found on the main Wordfence 'Options' page, below the Basic Options area described in the section above this one.
The first section here contains all of the Alerts options:
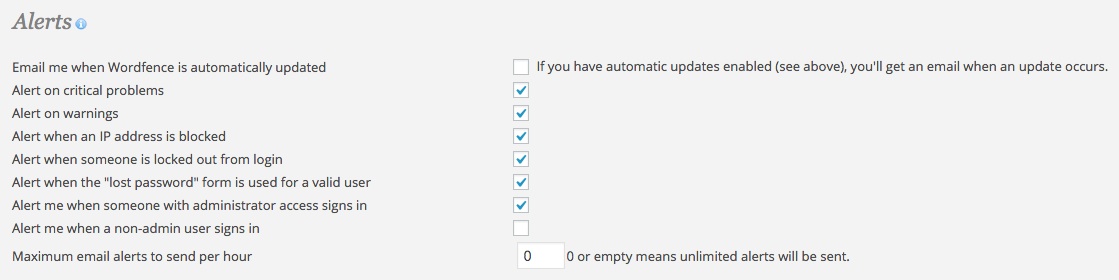
As you can see, this is the area where you can choose which email alerts you'd like Wordfence to send you.
The default settings are usually fine, but you might want to enter a number like '10' or '20' in the last input field. This will make sure Wordfence cannot send an excessive number of emails to you at once.
If you find yourself unhappy with the emails sent by Wordfence at any point, you can return here to uncheck some of these boxes. But if this is your first time using Wordfence, consider leaving them all checked to begin with. Then you can decide after a few weeks or months whether you want to stop receiving certain emails.
The next 'Advanced Options' section, Email Summary, contains some more email-related settings:
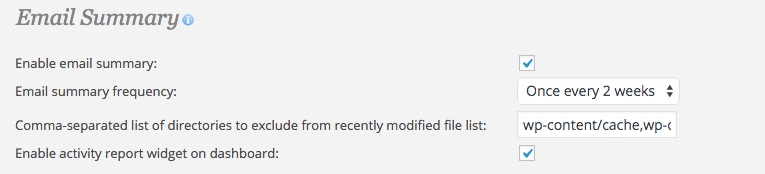
Here, you can choose whether you'd like to receive an email summary every 2 weeks. This is entirely up to you. If you haven't used Wordfence before, consider leaving these options checked by default. You can return later to modify these options if you like.
The next section contains settings that are to do with Wordfence's Live Traffic feature. You'll learn more about this feature in a dedicated section below.
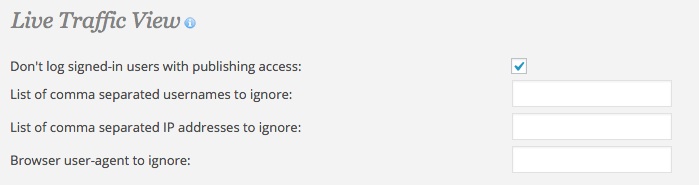
These settings allow you to ignore traffic on your site that is from trusted sources. This will help you identify possibly-malicious traffic on your site more easily in the Live Traffic view.
For now, you will likely find these default settings work well for your site. Once you have become more familiar with the Live Traffic view feature (which you may or may not use regularly), you might come back to this options area to adjust the settings.
In the next section, we can tell Wordfence exactly which of our WordPress website's files to scan when running a scan:
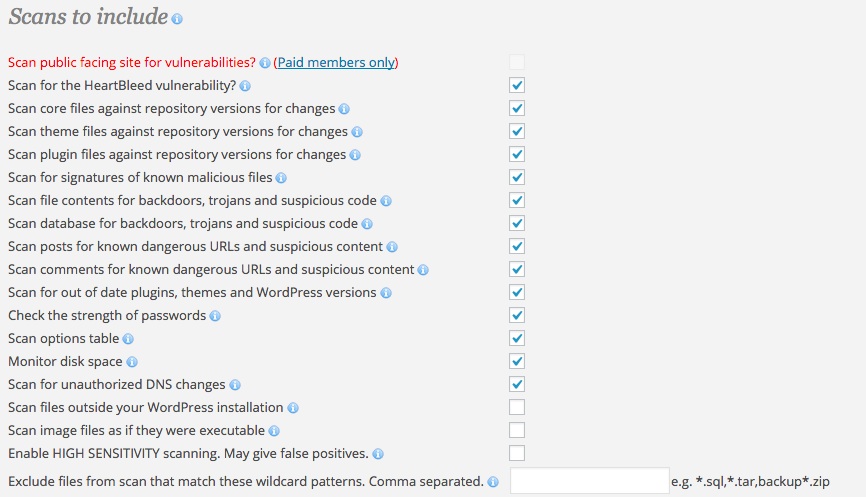
It's a good idea to check most of the boxes, as shown in the screenshot above.
This will mean that Wordfence does a thorough scan, but not a 'highly sensitive' scan which can result in a false positive.
You will get lots of information emailed to you whenever Wordfence completes an automated scan. Try to at least quickly review each of these emails to see what warnings are being given.
If you don't understand what a warning means, you can leave a comment at the bottom of this article to get some advice. Alternatively, you can research the warning in Wordfence's official documentation.
The next options section covers your site's Firewall rules:
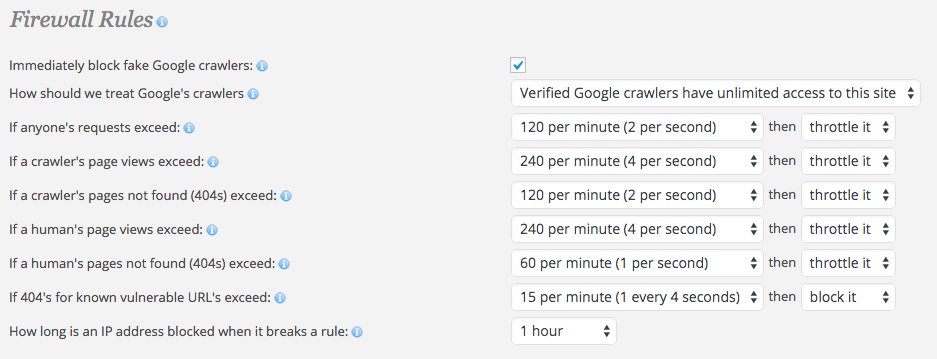
Here, we have some interesting options. We can throttle or even block website visitors (and remember: website visitors can include bots, like Google's site-crawling search bots), depending on how many 'requests' they make.
A 'request' is a request from the browser (if it's a human visitor) or the bot, asking your website's server to send them your website's files.
This happens pretty much everytime a human or bot visitor visits a page on your site (except in certain circumstances where some resources may be cached, e.g. in a human visitor's browser memory).
If a visitor makes dozens of very rapid requests, particularly if it's for pages that don't actually exist on your site, this is a strong sign that the visitor is maliciuos and is looking for vulnurabilities.
So update your settings here to match the ones shown in the screenshot above. They are in line with Wordfence's official recommendations for most websites.
If you find you have any issues in future with innocent visitors being throttled or blocked, you might return here to amend these settings.
The next section is the Login Security Options section:
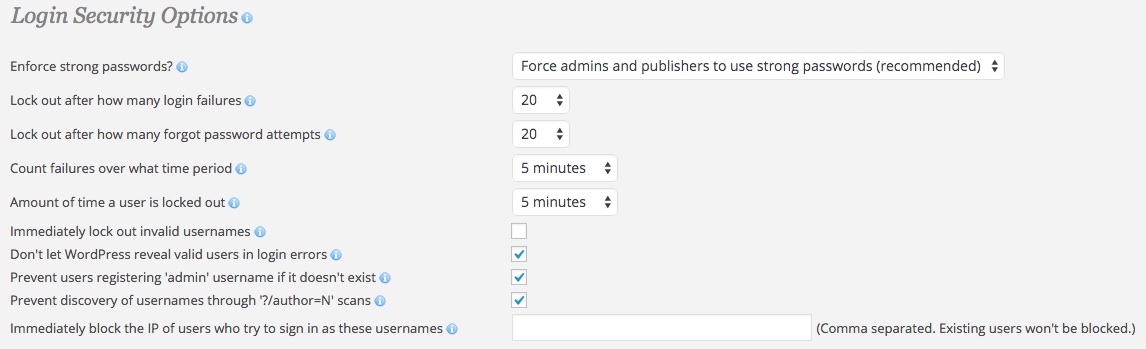
We can force anyone who has an account on our site to use a strong password, which is definitely recommended. The easiest way for a hacker to enter your site is to simply run a program that guesses hundreds of common, easy-to-guess passwords per minute. So make sure every account has a strong password.
Locking out a visitor after they have typed in a password wrong more than 10 times is often a good idea, for the same reason noted above. Many hackers will simply guess thousands of common passwords until they break into a WordPress website. So lock them out of they attempt this.
Choose how long to lock someone out for breaking these rules. 30 minutes is usually enough to put off a random hacking attempt.
Having a default admin account called 'admin' is a bad idea on WordPress sites, so check the box that disallows anyone from using that username.
If you already have an account with that username, make a new admin-level account with a much less recognisable name and delete the old admin account.
The next section is called Other Options:
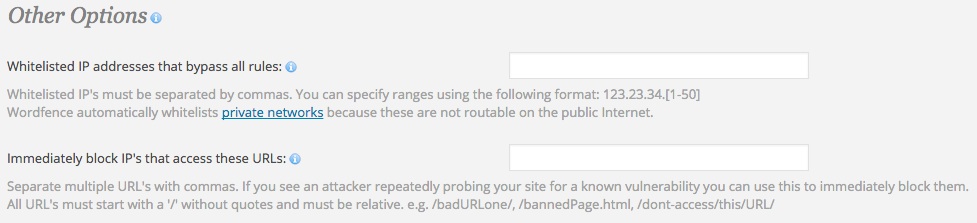
Most of the default settings are fine for most WordPress websites here. It's useful to notice the first input box: we can 'whitelist' certain individual IP addresses if we need to.
If you find that an innocent website visitor is being blocked from your website, you can find out their IP address and add it here.
The next input field allows you to set a trap for malicious visitors. You could add a URL that looks vulnurable (but which must not really exist), and then anyone who tries to visit that URL will be instantly blocked from your site.
This is an advanced feature that you might find helpful one day, if you discover a particular hacker is trying to exploit a particular vulnerability on your site. You can remove the vulnerability but put its URL here so that the hacker is tricked and blocked.
Finally, we have the Exporting and Importing Wordfence Settings section:
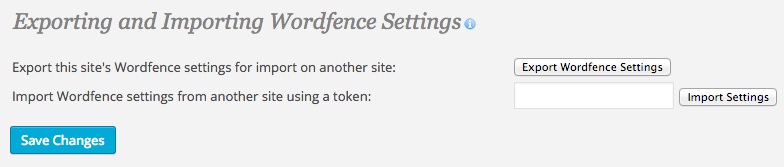
This is a very useful feature. If you've spent half an hour or more reviewing all of your Wordfence options, you don't want to have to repeat this task!
So make sure to export a file that contains all of your settings, and store it somewhere safe where you can find it again later if you need it.
Finally, don't miss the blue Save Settings button at the bottom of this screen. Click it now.
Step Four: Advanced Blocking
Use this Wordfence feature by clicking on the 'Advanced Blocking' submenu item, underneath the main Wordfence menu item:

Here, we can block an entire range of IP addresses. This isn't something you will likely need if your WordPress website isn't under attack, but remember that this feature exists in case you need it in the future.
You might also find the field for blocking visitors from certain referring sites useful here. If you use Google Analytics, you may notice that you're getting fake website visitors from spammy domains in your 'Referring Domains' report. (Click here to learn more about website traffic sources in Google Analytics.)
These fake visits are annoying, so you might find it useful to block those spammy domains here in Wordfence. Alternatively, you or your web developer might already be blocking these referring domains in your site's .htaccess file. So check whether that's already happening first.
Step Five: Whois Lookup
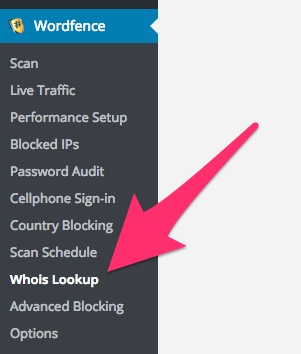
This useful feature will help you find out more about your site's traffic. You might have seen in an email report from Wordfence that supicious activity is occurring, and Wordfence will let you know the IP address that is suspicious.
You can then put this IP address into the Whois Lookup box and find out more about it. You will find out who is currently using that IP address (an IP address may be used by different people at different times), and you might find out that the suspicious website visitor as actually just an innocent search engine crawler bot.
To test this feature, try putting the IP address 8.8.8.8 in the box and clicking 'Look up IP or Domain'. Then scroll through the information shown to see which (very well known) company is using this IP.
Important: It's quite small and hard to see (at the time of writing), but Wordfence provides you with a link here that you can use to block all of the IP addresses used by this person or company:
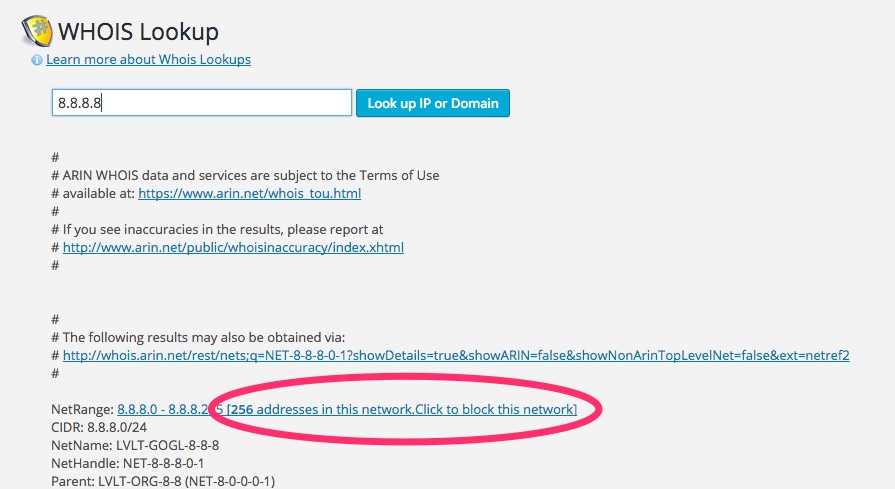
So if someone is behaving suspiciously or maliciously on your site, look up their IP address here to quickly block their whole network.
Step Six: Blocked IPs
This area is fairly simple. You can find it by clicking the 'Blocked IPs' submenu item, underneath the main Wordfence menu item:
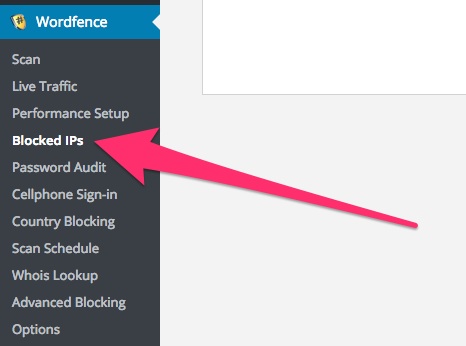
This is the area you should visit if you need to find out whether an IP is blocked or not, or if you need to manually unblock a particular IP.
This is a good place to visit periodically to see which visitors have been behaving suspiciously on your site.
You might then use the 'Whois Lookup' feature (described in the section above this one) to find out more about the IPs.
If you discover they are innocent visitors, you can unblock them. Or, if you discover those IP addresses are known to be malicious, you can quickly block them permanently.
This area is fairly simple. You can find it by clicking the 'Performance Settings' submenu item, underneath the main Wordfence menu item:
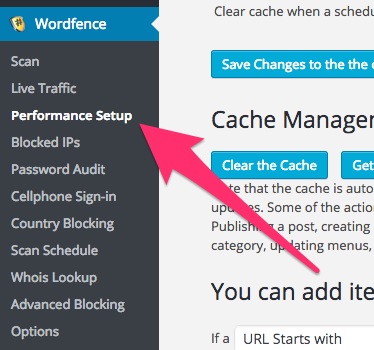
This area contains settings that are more about speeding up your site's loading times than about security.
You should check whether you already have one or more other plugin(s) installed that are providing caching features before enabling Wordfence's caching features.
You should also check whether your hosting company is providing special WordPress performance features. If other caching systems are already being used, you might not want to use Wordfence caching.
If a web developer is helping you with your site, you can ask them to find out for you.
If you find out that no caching features are currently enabled on your site at all, then definitely test Wordfence's 'Falcon Engine'. You might find that it improves your site's load times dramatically.
Step Eight: Live Traffic
This area is fairly simple. You can find it by clicking the 'Live Traffic' submenu item, underneath the main Wordfence menu item:
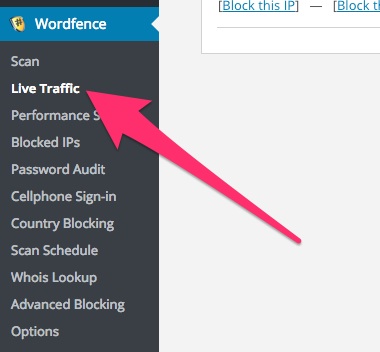
This is an interesting area to check regularly.
You might not always see much information here, but over time you will be able to see information about a variety of your website's visitors.
For example, you might see a search engine crawler bot looking at your site's robots.txt file.
Or you might see a human visitor from India, the Phillipines or the United States looking at one of your site's pages.
Using the 'Pages Not Found' and 'Top 404s' tabs, you can also see whether perhaps there is some suspicious activity going on on your site.
It's easy to do a Whois checkup on an IP address here, or to block the IP quickly if you need to.

Step Nine: Scan
This area is fairly simple. You can find it by clicking the 'Scan' submenu item, underneath the main Wordfence menu item:
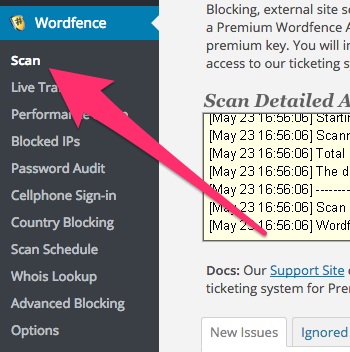
You can manually initiate a Wordfence scan of your site here, regardless of whether or not you enabled automatic scans in the Basic Options area (see Step Two: Wordfence Options, above).
Start a scan now, if this is your first time using Wordfence.
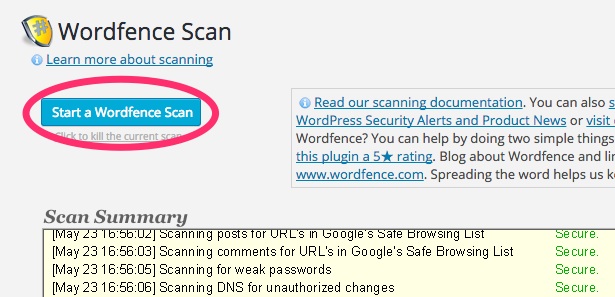
In the Scan Summary area, you can watch the scan's progress. Depending on the site of your site (its files, i.e. themes, plugins and uploads, plus its database, i.e. pages, posts and comments), the scan might take some time.
Once it's finished, you can scroll down slightly to view the results. Helpfully, Wordfence offers information and recommended solutions to any problems found.
If you see a problem listed that you don't understand, add a comment at the bottom of this article to ask for advice. We'll try to help you quickly.
Also leave a comment if you have any other questions, or any extra advice about Wordfence to offer to our readers.
