Three Ways to Make Skin Look Perfect in Photoshop
Tuesday 11 November 2014, by Lewis Swift
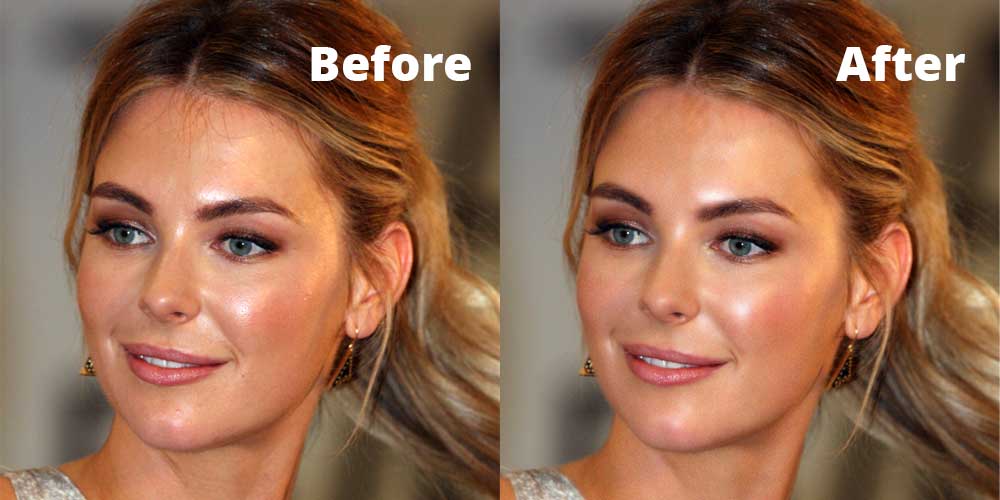
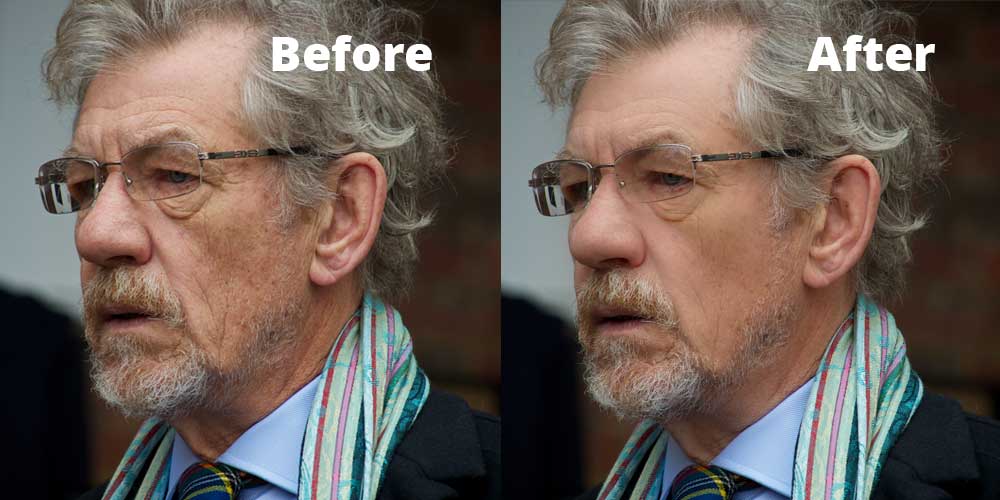
There are a variety of ways to make skin look smooth and bright using Adobe Photoshop. Some methods are quick and easy, while others require a little more care and attention. Here, we’ll give you step-by-step instructions, including screenshots, for three techniques that we think will help you handle most skin-smoothing situations.
This tutorial was developed using Adobe Photoshop CC 2014 but you should find similar features to those mentioned here in slightly older versions, too.
Method 1 - The Quickest Way to Smooth Skin
If you’re short on time, you can quickly improve the texture of any skin in a photo with just a few minutes’ work. It may not give you the most natural or professional finish but sometimes speed is more important than pixel perfection.
-
Open up your photo in Photoshop by going to File > Open… (if you need a photo to practice on, you could download this one from Wikipedia) and locating the photo you’d like to work on
-
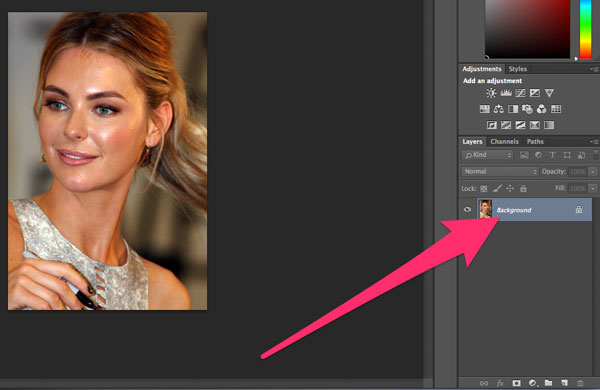
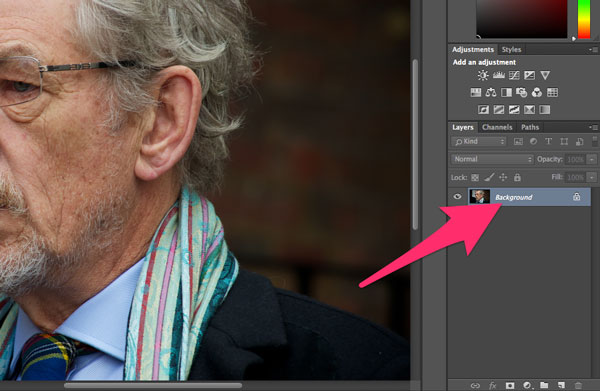
Your photo will start out in a layer called ‘Background’ with a lock symbol on it (as it’s a locked layer), so double-click on that layer to unlock and rename it
-
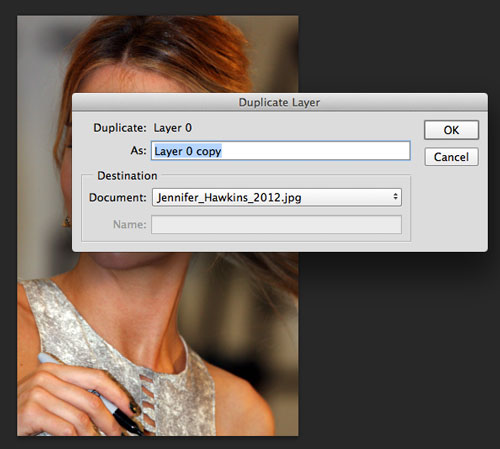
Once that first layer is renamed, you can right-click and select ‘Duplicate layer’ to make a copy of it
-
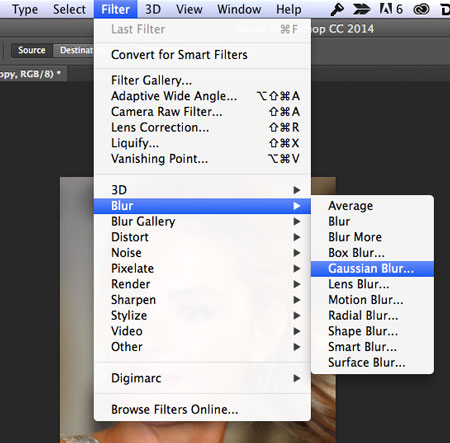
Make sure you have the new copy layer (the top one) selected now, and go to the Filter menu to find the ‘Blur’ option, and then the ‘Gaussian Blur...’ option underneath that
-
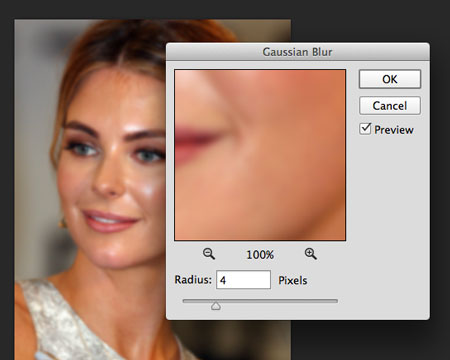
Make sure the ‘Preview’ box is ticked and choose a blur radius that makes the skin in your photo look smooth but not too blurry (if you’re using the example photo we’ve linked to in Step 1, a blur radius of 4 pixels may be best) - then click ‘OK’
-
Next, with the same top layer selected, go to the Filter menu to find the ‘Noise’ option, and then the ‘Add noise...’ option underneath that
-
When the Add Noise dialog box opens, again make sure the Preview box is checked so you can pick a noise amount that suits your image (an 8% noise amount seems to work well for our example photo) - then click ‘OK’

-
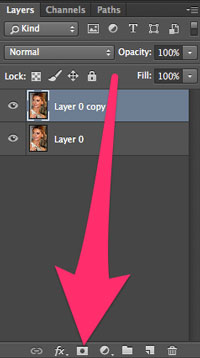
Now look at your Layers panel again to find the ‘Add Vector Mask’ icon and click on it to add a mask to your top layer
-
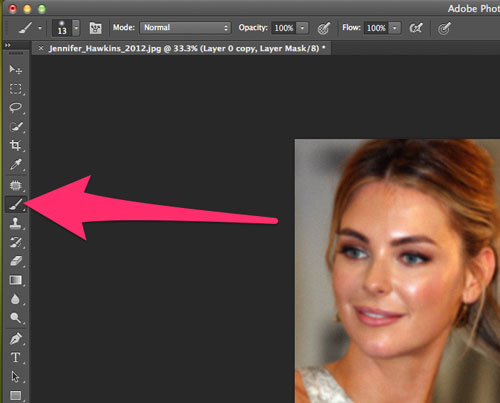
Make sure this new mask is selected (click on it to select it, if you need to), and then look to the left-hand side of the screen to find the brush tool icon in the menu there
-
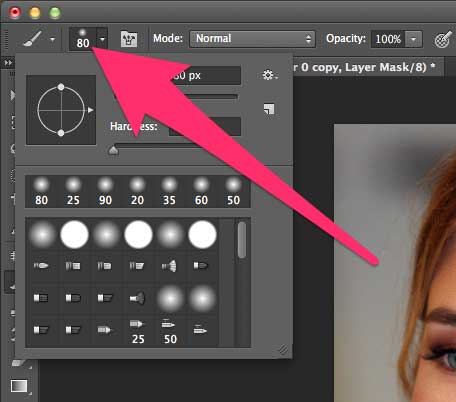
Once you’ve selected the brush tool, you can click on a dropdown menu above to set the brush’s size and hardness - make sure hardness is set to 0 so we have a very soft brush to work with
-
You can also use the shortcut keys ‘[‘ and ‘]’ to change your brush’s size, so close the brush tool options menu by clicking anywhere on your photo to try that now (you might need to press the shortcut keys several times to notice a difference in size)
-
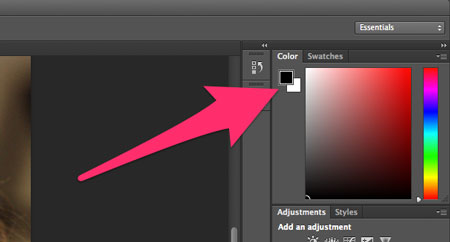
Make sure that you have a black foreground colour and a white background colour selected in your colour palette - click on either square to change the color if you need do
-
While you have a vector mask selected (remember, you created and selected a vector mask in steps 8 & 9), black will erase the mask and white will un-erase it, so use a small black brush to erase the mask from any facial areas in your photo that have important details, like the eyes and mouth - this will remove the blur and noise effects from these areas
-
It’s a good idea to also use this small black brush to unblur the outlines of the nose, chin and ears, as this will help make your photo look much more natural
-
If you make a mistake and erase the wrong part of the mask, you can switch to a white brush (using the ‘x’ key on your keyboard as a shortcut) and paint over that area to replace the mask there - press ‘x’ again to switch back to black to continue erasing afterwards
-
Use a larger black brush to remove the noise and blur effects from any non-skin areas, like the background, clothing and hair
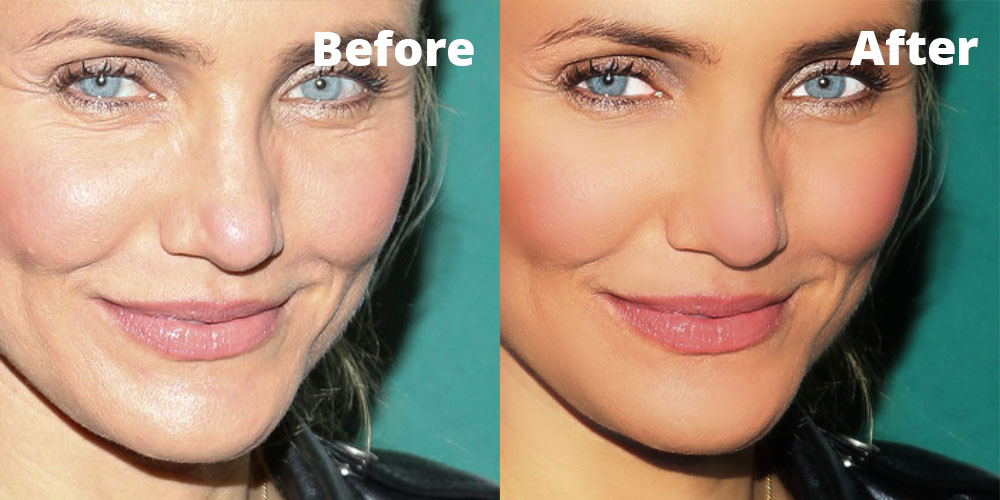
Method 2 - The Most Natural Skin-Smoothing
For a natural effect, you’ll want to keep the smoothing and blurring effects to a minimum. You’ll also want to keep quite a lot of the face’s natural details in there, such as fine lines and creases, moles or baby hairs.
This method will allow you retain those details, while providing an attractive glow to the skin.
-
Firstly, open your image in Photoshop by clicking on File > Open… and locating the image you’d like to edit (if you want to practice on an example image, you could use the same one as us
-
Once your image has opened, it will automatically be set in a locked layer named ‘Background’ with a padlock icon on it
-
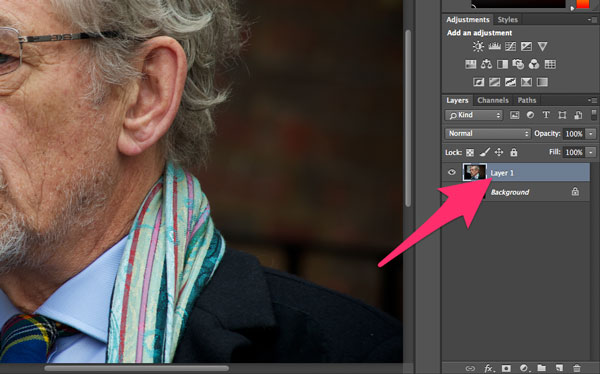
Press ‘CTRL+J’ (on WIndows) or ‘CMD+J’ (on a Mac) to create a duplicate of this layer, named Layer 1 - we can now work safely knowing that we have the untouched original photo as the bottom layer should be need to start again
-
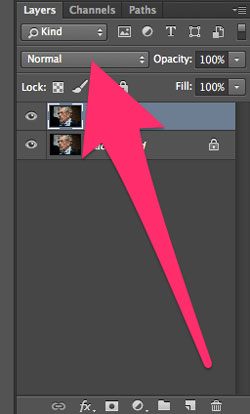
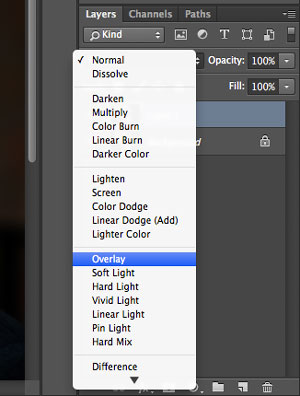
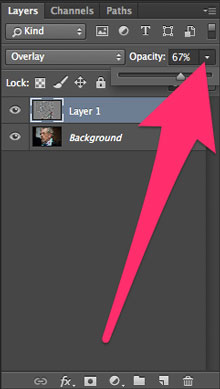
With your new ‘Layer 1’ selected (click on it to make sure), change its blend mode to ‘Overlay’ from the drop-down menu near the top of the Layers panel
-
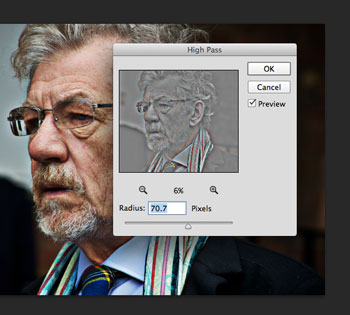
Next, cick on the ‘Filter’ menu at the top of your Photoshop screen and hover over ‘Other’ so that you can click on ‘High Pass...’ to open the High Pass dialog box
-
Make sure that the Preview box is checked in the High Pass dialog box, and zoom out of the preview image to see the whole thing if you need to so that you can choose a Radius that makes your preview look like the one in our screenshot above
-
Click ‘OK’ to apply the High Pass effect, which will make your image extremely sharp - we want to invert that effect, so press ‘CTRL+i’ (on WIndows) or ‘CMD+i’ (on Mac) to do so
-
A strong blur effect has now been applied, although you’ll notice that it is not applied where edges were detected during the High Pass process - we can reduce the blur to a natural level by reducing the opacity of our Layer 1 as show in the following screenshot
-
It’s now time to selectively remove the blurring from non-skin areas of the face, as well as from highly-detailed facial areas like the eyes and mouth - refer to steps 8-16 from the previous tutorial (‘Method 1 - The Quickest Way to Smooth Skin’) to accomplish this - and then your natural-looking image is complete!
Method 3 - The Most Professional Technique
For a truly professional, magazine-style finish, you’ll want to spend some extra time implementing a range of techniques. Spot-healing and colour adjustment are amongst the essential tactics in achieving that final high-fashion look.
-
Open your image in Photoshop by clicking on File > Open… and locating the image you’d like to edit (if you want to practice on an example image, you could use the same one as us from here)
-
Select the ‘Background’ layer and press CTRL+J (on Windows) or CMD+J (on Mac) to duplicate it
-
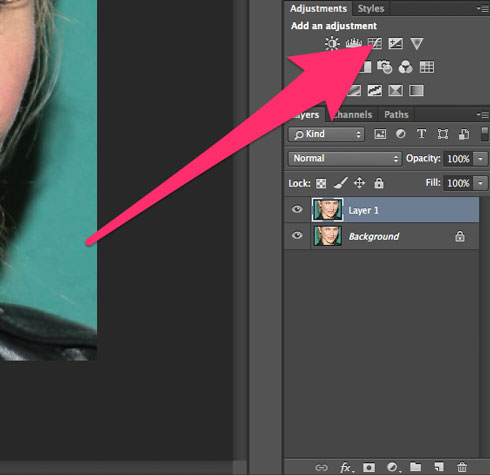
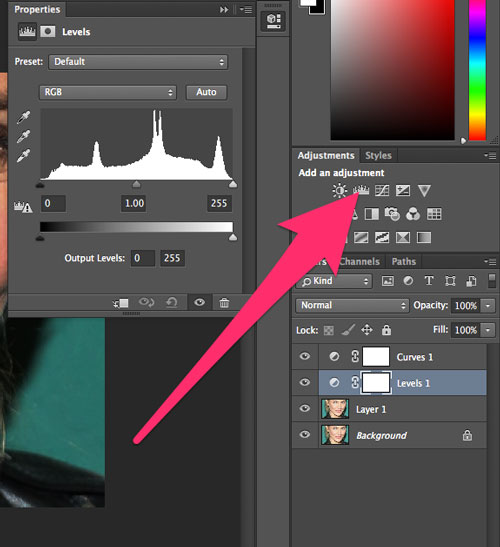
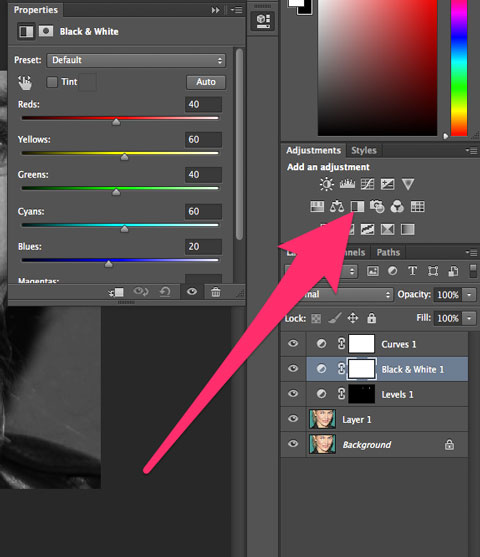
Now click on the Curves icon in the Adjustments panel to add an adjustment layer
-
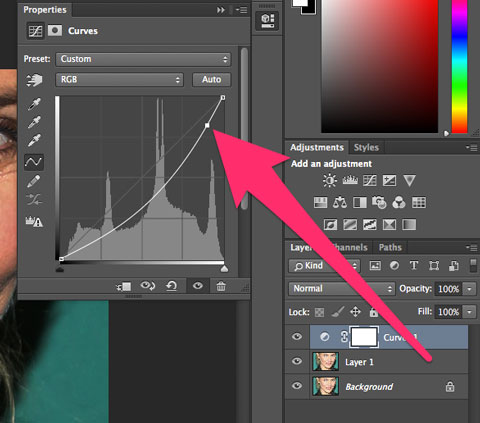
In the Curves properties panel that opens, reduce the lightness of the image so skin tones are warmer (you may want to do the opposite if the tones in your picture need to be cooler) - do this by clicking on the graph’s line near the top and dragging it downwards slightly
-
Now click on your ‘Layer 1’ layer again, and then click on the Levels icon in the Adjustments panel to add a Levels adjustment layer below your Curves layer
-
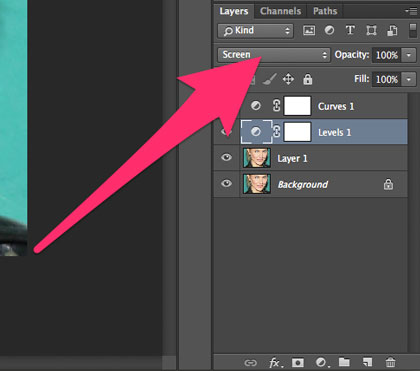
Don’t change any options in Levels properties panel, just set the Blend Mode of your Levels layer to ‘Screen’ so everything is whitened
-
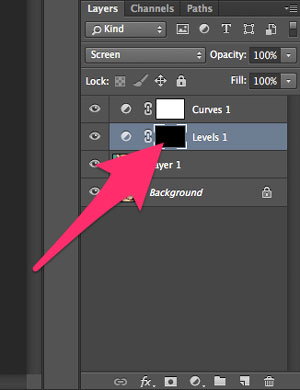
Now make sure the mask on your Levels layer is selected and then select the fill icon in the left-hand menu, make sure your foreground colour is set to black and then click on your photo to fill the mask with black
-
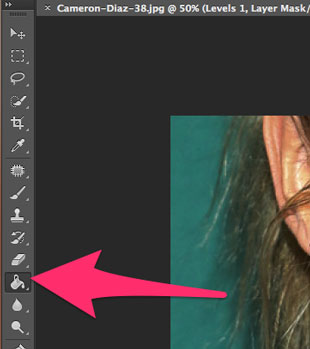
Now press ‘B’ to select the Brush tool, press ‘x’ to change your foreground colour to white and use the ‘[‘ key if necessary to shrink the brush so that you can use it just on the whites of the eyes to lighten them
-
Now add a Black & White adjustment layer between your Levels and Curves layers
-
In the Black & White properties panel, move the Red & Yellow sliders left to create strong contrast in the photo
-
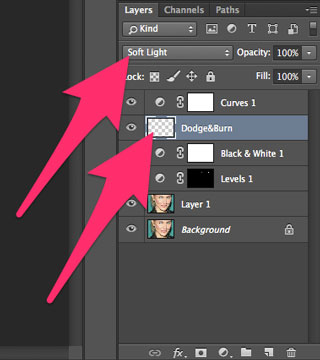
Now create a new empty layer above Black & White adjustment layer with ‘Soft Light’ blending mode applied - name this layer ‘Dodge&Burn’
-
Set your colour swatches to black and white, if they aren’t already, press the ‘B’ key to select the Brush tool and make sure your have your ‘Dodge&Burn’ layer selected
-
To remove fine lines from the face: use a soft paintbrush at about 20% opacity and zoom in very closely to your photo to paint over the dark lines with a very small white brush - this requires care and may take some time
-
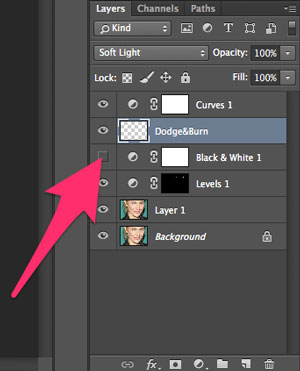
Zoom out of your image and make the Black & White adjustment layer invisible to check the results of your work
-
To reduce shine from camera flash, make the Black & White layer visible again and select your ‘Dodge&Burn’ to use a bigger brush at about 10% opacity to slowly and carefully reduce the lightness of any shiny areas
-
Leave this Black & White adjustment layer invisible once you have finished reducing any fine lines or shiny areas
-
To airbrush the skin, first select all of your layers (hold CTRL or CMD and click each one of them in turn to do this) except the locked ‘Background’ layer, and press CTRL+G or CMD+G to put them into a group
-
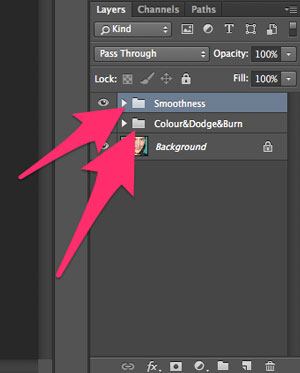
Name this group ‘Colour&Dodge&Burn’
-
Make sure the Blending Mode of your ‘Colour&Dodge&Burn’ group is set to Normal
-
Right-click on your ‘Colour&Dodge&Burn’ layer group and select ‘Duplicate group...’
-
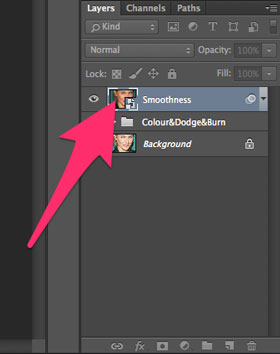
Name your new group ‘Smoothness’ and click ‘OK’
-
Now right-click on your ‘Smoothness’ group and click ‘Convert to Smart Object’
-
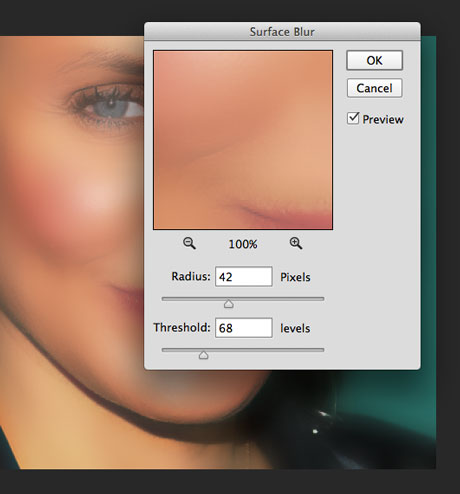
With your ‘Smoothness’ smart object layer selected, go to the Filter menu and click ‘Surface Blur’ under ‘Blur...’
-
In the Surface Blur options box, set the Threshold value to 255 levels, then adjust the Radius until the face is almost too blurry to see
-
Then reduce the Threshold levels until you can just start to see the details in the face but the skin is still blurry, then press ‘OK’
-
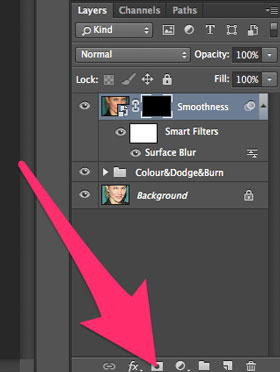
Now, with your ‘Smoothness’ layer selected, hold the ALT key and click the ‘Add Vector Mask’ button to add an inverted vector mask
-
With this black/inverted layer mask selected, use a soft white brush at about 50% opacity on the photo to bring back the skin-smoothing effects from the ‘Smoothness’ layer to the areas where it looks most natural
Summary + Bonus Plugins
Now you’re equipped with a set of skills that should help you next time you need to create smooth skin in a photograph using Photoshop. Let us know in the comments if there are any other methods that you know of and want to share with other readers, or if you have a question about any of the steps above.
You might also be interested in looking at some skin-perfecting Photoshop plugins if you have the budget and a lot of photos to edit and no time for custom work. Here’s a bonus list of three pro skin-correcting plugins:
- The Arcsoft Portrait+ plugin will automatically detect faces in your photo, refine skin tone and texture and even add makeup effects ($79.99/£50, requires Photoshop CS5 or above)
- The Pictocolor iCorrect Portrait 2.0 plugin allows you to instantly correct the white balance, exposure, and skin tone of any portrait ($99.95/£62.50, requires Photoshop CS3 or above)
- This Pro Retouch 2.0 plugin creates perfect skin, eyes teeth and hair in seconds, with different options from natural to magazine-quality flawlessness (costs $99/£62, requires Photoshop CS2 or above)
For more plugin information, check out our list of the most useful free plugins for web designers.
