6 Ways to Use Google's Webmaster Tools for SEO
Tuesday 24 March 2015, by Lewis Swift
Jump to:
- Submit Your Sitemaps
- Discover URL Errors on Your Site
- Check your structured markup
- See which search terms your site is ranking for
- Find out who's linking to your site
- Test your site's speed and user experience scores
If you're optimising a website for better search rankings, Google's Webmaster Tools should be one of your first ports of call.
Google offers this free suite of site analysis and testing tools to help website owners improve their websites, which can result in those websites ranking higher for relevant search terms.
At the end of the day, it's in Google's interest to have a bigger pool of well-made, error-free websites to choose from when serving their users' search query results. And it's equally in our interests, as website owners, to provide Google with those top-quality sites.
If website owners improve their sites using Google's Webmaster Tools, Google has better search results to show. Everyone wins.
If you haven't signed up for Google's Webmaster Tools yet, you can read our article to find out how to get started. It includes a written tutorial with screenshots, plus helpful videos.
Bing offers a suite of very similar tools, too, of course. Head to Bing's Webmaster Tools page to sign up and submit your site there. All of the tips below apply to both Google and Bing's Webmaster Tools, because they're very similar and were built for the same purpose (but for different search engines).
1. Submit your sitemap(s)
A sitemap is an XML document containing the essential information about each page of your website. If you submit a sitemap in Google's Webmaster Tools, it will help Google's 'crawlers' find their way around your website.
It's important that we help Google to find each page of our site. We can partly do this by designing our site to have a strong navigation system, such as navigation menus, breadcrumbs and HTML sitemaps (click here to view Amazon.com's HTML sitemap—it's a well-organised list of all the main pages of their site). But we can help ensure that Google finds all of our pages by also creating and submitting an XML sitemap.
XML is a simple kind of code, similar to HTML, which is designed to be easily read by machines. Humans can read it easily, too, but the most important job of XML code is to give information to search engines and other applications.
An XML sitemap will contain the most relevant information about your site for Google to sort through. It essentially just lists each of the pages on your site, along with the date that page was last modified, how often it's modified and its priority on the site.
An XML sitemap's contents look like this:
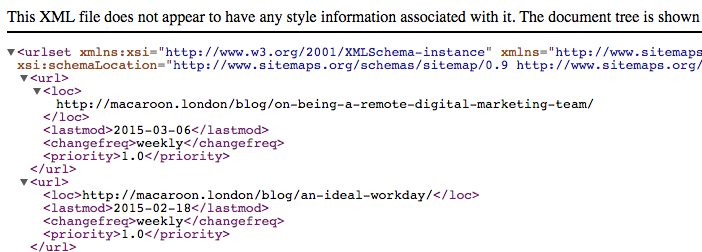
With this information, Google will be able to find each page on our site. And when we add a new page, such as a new business location page or a new blog post? Our sitemap will be updated and Google will, therefore, quickly learn about that new page. This massively improves the chances of that page ranking for relevant search terms.
Fortunately, we don't need to know how to write XML in order to create a sitemap and benefit from all of this.
If your website is built on a content management system like WordPress, Joomla or Drupal, you'll be able to use a plugin to generate a sitemap for you. For example, in our article on using a WordPress SEO plugin, we show how the WordPress SEO by Yoast plugin makes it easy to generate a sitemap (and submit your site to Google's Webmaster Tools).
If you can't use a plugin to automatically generate a sitemap for you, that's no problem. You can use one of the many free online tools, like www.xml-sitemaps.com or www.web-site-map.com, to create a sitemap manually.
Once the tool produces a sitemap file for you (called something like sitemap.xml), you'll need to uplaod that file to your website. Speak to your web developer if you're not sure how to add a file to your site.
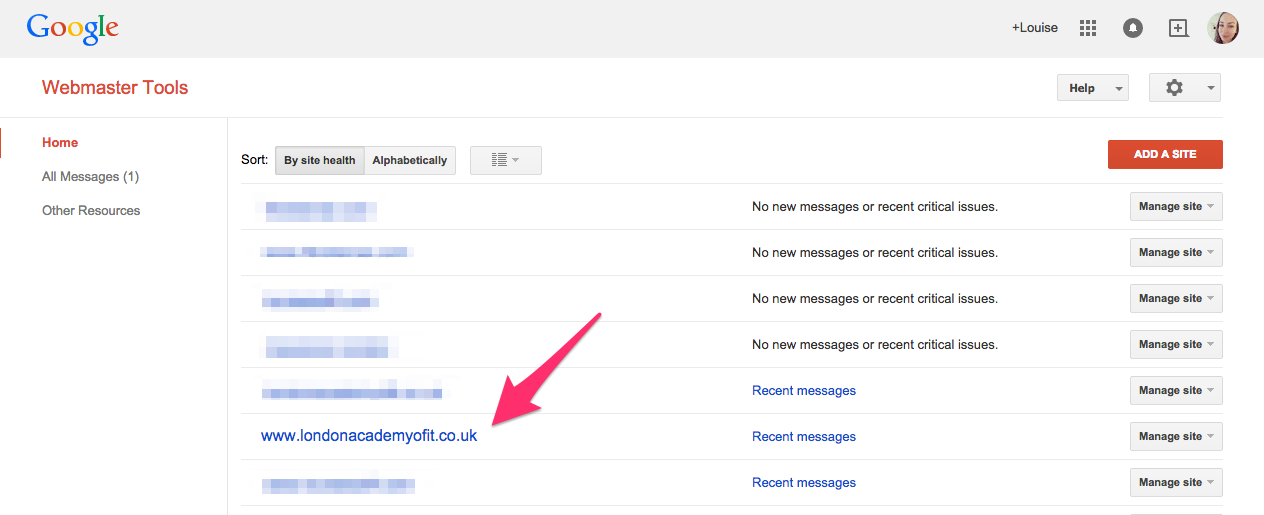
Once it's uploaded you can login to Google's Webmaster Tools and select your website:
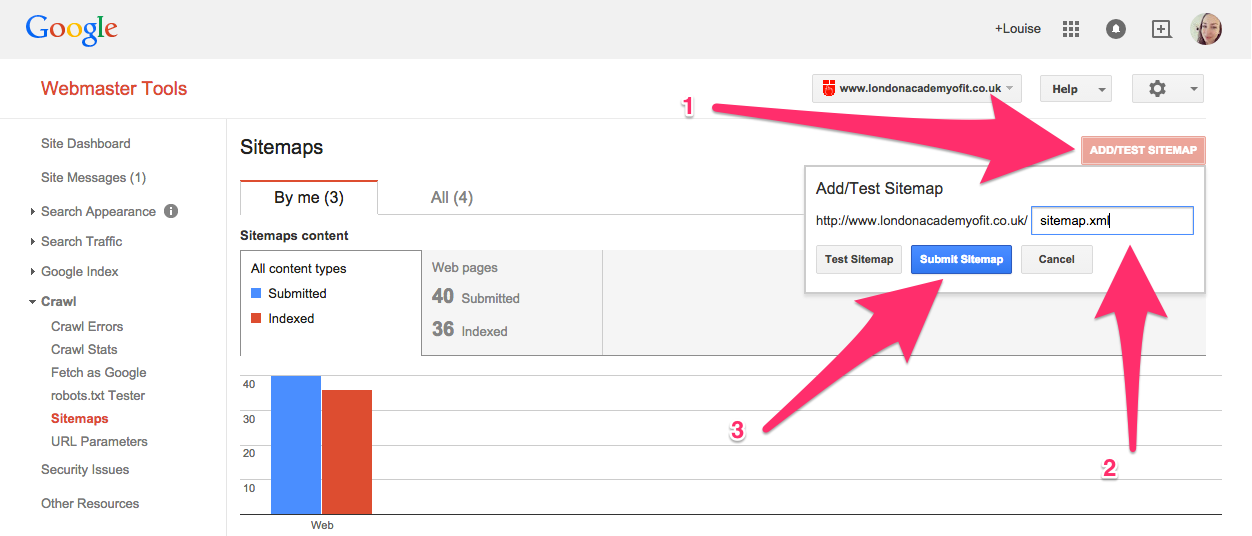
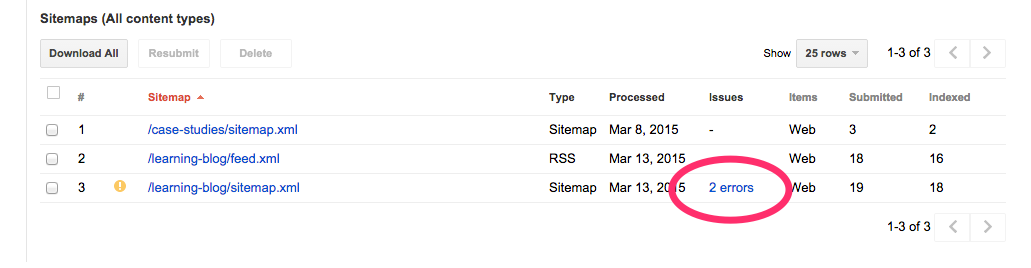
Then you can choose 'Sitemaps' from underneath the 'Crawl' menu item on the left:

And then you can click on the 'ADD/TEST SITEMAP' button in the top-right, enter the location of your sitemap (probably www.yoursite.com/sitemap.xml or similar) and click 'Submit Sitemap':
You can also use RSS feeds as sitemaps, if you want to make doubly-sure that every single new post on your website is found and indexed by Google. Submit them here in the same way you'd submit any sitemap.
2. Discover URL errors on your site
Next, you can choose 'Crawl Errors' from the left-hand menu to find some more useful information:
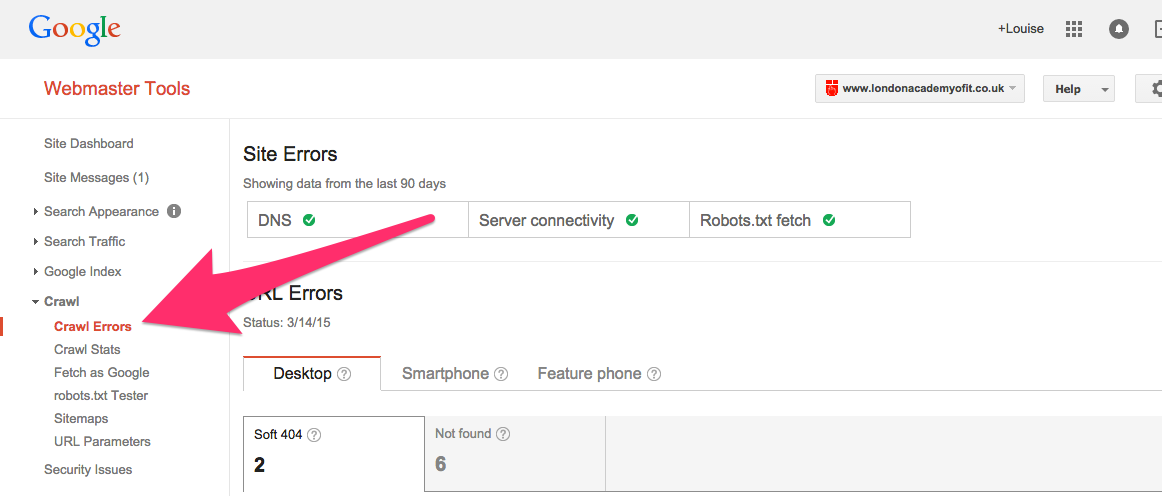
It might take a few days for Google to fully crawl your submitted sitemap(s), but if they spot any errors they will appear here.
This is extremely useful information. Without this sitemap-checking tool, we'd all have to check every link on our sites ourselves to make sure none were broken. On websites with 10,000+ pages, this would take a lot of time!
It's common for a website's pages to change location or be removed entirely. For example, a blog post could be moved from the 'News' category to the 'Events' category. This would mean the page's URL changes from example.com/news/post-title/ to example.com/events/post-title/.
In this situation, a 301 redirect should be put into place in order to make sure that people who try to access the page at its old URL are taken to the new URL. This will mean that search engines can find the page at its new location.
301 redirects can be added to your website's .htaccess file. Read more about how to do that here, or ask your web developer to do this for you.
In this 'Crawl Errors' area, you can also see at a glance if there are any problems with your robots.txt file or your website's server.
3. Check your structured markup
Structured markup is a way of helping search engines understand what the content on your website is about. For example, if a page contains an address, is it the address of a local business or the address of an event venue? If it contains a person's name, is it the author of the article or the company CEO?
For more information on how to add structured markup (or 'Schema' markup) to your website, you can read our in-depth article here.
Schema markup can be tricky to implement correctly, especially if you're adding lots of different types of it to lots of different pages. So it's important to check it using Google's Structured Data section:

And if you notice any problems, you get specific information about how to fix them here.
4. See which search terms your site is ranking for
A few days or weeks after you've submitted your site in your Google's Webmaster Tools account, you'll start to see data about the search terms your website is ranking for.
This information can be found under 'Search Queries', which is under the 'Search Traffic' menu item:
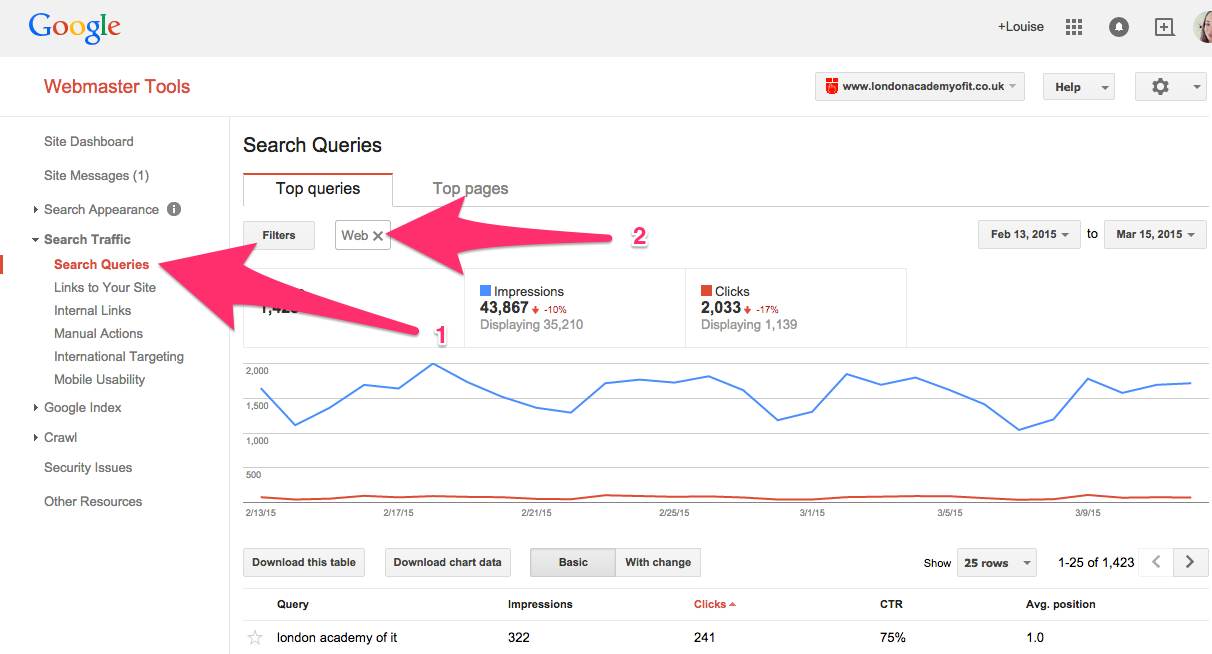
Make sure to remove the 'Web' filter, as shown above, if you want to see all of your data. Otherwise, you'll only see your search queries and rankings for web searches.
In this view, you can view the queries that your site is appearing most often for, as well as the page of your site that are being seen most often in the search rankings.
You can check whether the queries that you're ranking for are relevant, and which are the most important landing pages on your site.
If you're not ranking for relevant keywords, you need to think about how to better optimise your site. Schema markup (mentioned in the section above, with a link to more information) is a good start.
The top pages on your site should get special treatment when it comes to design, UX and other optimisations. These are pages that are receiving the majority of your organic traffic. Are they answering users' queries clearly? Can users achieve their goal here quickly and easily?
You can filter search queries by web or mobile here to see how your site is performing for searches on different devices. Google is getting stricter about which sites can rank highly for mobile searches; sites that load quickly and have good mobile user experience will displayed preferentially.
You can also filter search queries by location, to see how your site's rankings differ in different parts of the world. This could be very important for international websites.
5. Find out who's linking to your site
Link-building is still an important part of SEO, but it's much more complicated now than it used to be. Before, more links pointing to your site meant higher rankings. Now, the quality of the links is very important.
The first step in guaging the quality of the links pointing to your site is checking and exporting the list of links in Google's Webmaster Tools.
Find the 'Links to Your Site' menu item underneath 'Search Queries' first:
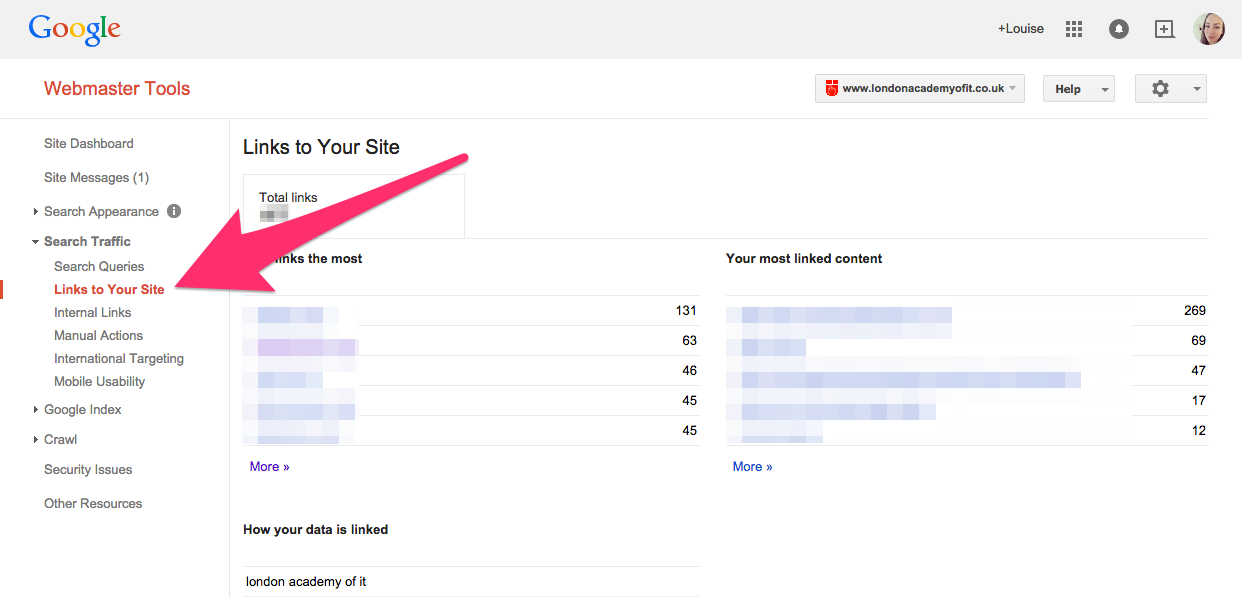
If you click the first 'More' link, you'll be shown a full list of the links (that Google knows about) that are pointing to your site. From this screen, you can use the 'Download this table' button to export the links as a CSV file.
This file can be imported into an Excel spreadsheet or a Google Docs spreadsheet. You can then add some extra columns to fill in extra information about the sites linking to you.
For example, you might want to use the MozBar browser plugin to quickly see each sites' PA and DA ('page authority' and 'domain authority') scores. This will let you know whether they're good sites to have links from.
If the sites have a low PA/DA score, you might want to consider contacting the site owner to have the link to your site removed from theirs.
If the sites have high PA/DA scores, you can find out exactly why they're linking to you and use that to influence your future link-building strategies.
6. Test your site's speed and user experience scores
Google is increasingly interested in the quality of a website when it comes to deciding where it should rank for search queries.
An easy-to-use website, where each page loads quickly and has a clear purpose for users to achieve, will rank higher in the search results.
It's particularly important to make sure your website performs well on mobile devices, as more than half of all searches are done on phones and tablets nowadays.
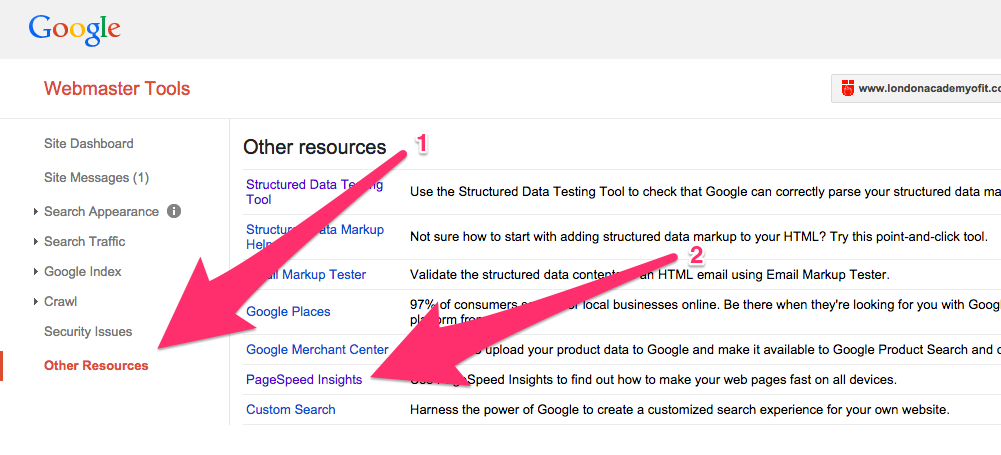
To make it easier for us to improve our websites' page load times and user experience, Google's Webmaster Tools includes a Page Speed Insights tool. It's located under the 'Other Resources' menu item:
Google will give you a full report on whether your site is loading quickly and whether there are any UX problems that you need to address. It can be a big job to tackle if your site hasn't been optimised yet, but it's vital to invest in this area if you want your site to get more traffic from organic search sources.
