Add an SEO Plugin to Your Wordpress Site
Tuesday 02 December 2014, by Lewis Swift
There are two main choices when it comes to Wordpress SEO plugins: “All-in-One SEO“ and “Wordpress SEO by Yoast”. The most important difference between the two is the way they handle choosing the keywords you’d like to target with the page or post you are creating.
All-in-One SEO allows you to enter multiple keywords to target per page, while the Wordpress SEO by Yoast plugin makes you choose just one keyword to target.
It may initially seem like a good idea to target as many keywords as possible with every post and page of your site, but it’s actually much more efficient and effective to just target one keyword per post or page. Here’s why:
You don’t want to have different pages on your site competing to rank for the same keyword - better to have just one page competing strongly (it’s very unlikely that Google will show multiple pages from the same website in the results for a non-branded search - except perhaps forums and social sites which contain content from lots of different sources/authors)
If you only have one page per keyword, you’ll be able to put more text, images, videos, etc on that page (longer content tends to rank better, at this time of writing)
You’ll ideally also then only have one specific visitor archetype/persona to target with each page, which will make choosing your design, wording and media to meet the goals of that page easier
This guide, therefore, focuses on how to install, set up and use the Wordpress SEO by Yoast plugin on your Wordpress website.
Updating Your Permalinks
Do this right away, if you haven’t already. Your Wordpress website’s permalinks are the parts of the URL shown in the address bar after your ‘root domain’.

In the screenshot above, the permalink is an unfriendly ‘URL parameter’, telling Wordpress which page to display but not telling the user or search engines anything helpful. The screenshot below shows a much more descriptive permalink style:
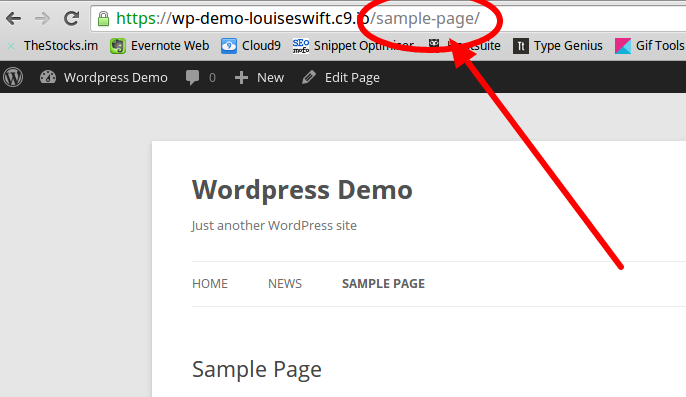
Having friendly, readable permalinks will help visitors understand where they are on your website, will look better when people share links to your site with others, and will help search engines understand what your site’s about.
To change your site’s permalinks, login to your Wordpress Dashboard and go to Settings > Permalinks from the main left-hand menu:
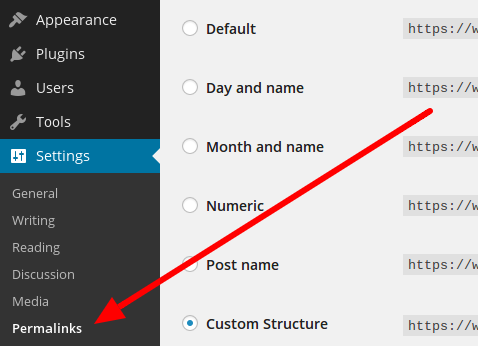
Choose ‘Custom Structure’ from the permalink options list, and enter the following code in the input field beside that option:

If you'd like to copy and paste the code, you can do that now:
/%category%/%postname%/
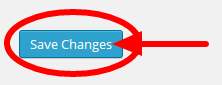
Finally, scroll down to click the blue ‘Save Changes’ button:
Now you can visit your Wordpress website’s homepage (or refresh it, if it’s already open in another tab) and then click on any other page or post’s link. You’ll see that the URL in the address bar now contains a ‘pretty’ permalink.
Thinking About Your Website’s Structure
The way you organise the pages, posts and categories on your website will affect the URLs of each page and post. In an ideal world, each page or post’s URL will contain descriptive keywords that tell users and search engines about the page or post’s content.
Consider this diagram of an example e-commerce website structure and each page’s focus keyword/phrase:
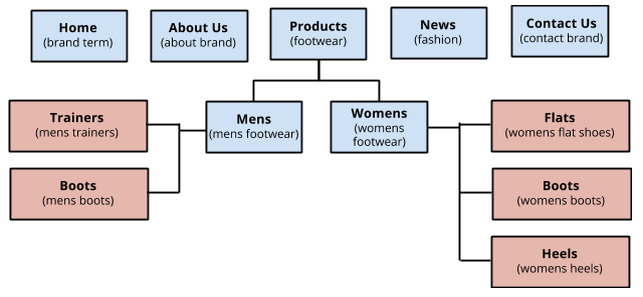
Individual product pages have URLs that include their categories as well as the name of the product. For example, from the diagram above, the ‘Womens Boots’ page will have a URL of: www.examplebrand.com/footwear/womens/boots/ - this is very descriptive.
URLs like these act as ‘long-tail keywords’: highly-targeted phrases that may not be searched for very often but which could bring you traffic that is very likely to make a purchase.
It’s important to target longtail keywords with the deeper-level pages and posts on your site, in order to attract traffic that is looking for exactly what you’re offering, but it’s also important to consider broader keywords for higher-level pages.
Installing the Wordpress SEO by Yoast Plugin
Follow these steps to add this plugin to your website, if you haven’t already.
Visit your Wordpress website’s Dashboard by visiting http://yourdomain.com/wp-admin/ and logging in with your username and password
Hover on ‘Plugins’ in the main menu on the left-hand side, and choose ‘Add New’ from the submenu
In the Add New Plugins view, type ‘Wordpress SEO by Yoast’ into the search box and press enter to search
Find the Wordpress SEO by Yoast plugin in the results (it should be first), click on its ‘Install Now’ button and then click ‘OK’ when the confirmation pop-up appears
Wait a few moments for the plugin to be installed and then click ‘Activate’
You’ll then be taken to the Installed Plugins view, where you can scroll down to check that the Wordpress SEO by Yoast plugin is indeed installed and activated
Watch this video if you'd like to see the above steps in action:
Adjusting the Wordpress SEO by Yoast Plugin’s Settings
To check or adjust the Wordpress SEO by Yoast plugin’s settings, follow these steps:
Visit your Wordpress website’s Dashboard by visiting http://[YourDomain].com/wp-admin/ and logging in with your username and password
If the Wordpress SEO by Yoast plugin is installed and activated, you will see an ‘SEO’ item in the main left-hand menu (if you don’t see it, head to Plugins > Installed Plugins to check whether the plugin is installed and activated - if it’s not installed, follow the steps above to install it)
If you do see the SEO item in the main left-hand menu, click on it to be taken to the plugin’s General Settings view
Here, you can take a tour of the plugin’s features or quickly restore the plugin’s default settings if you need to: 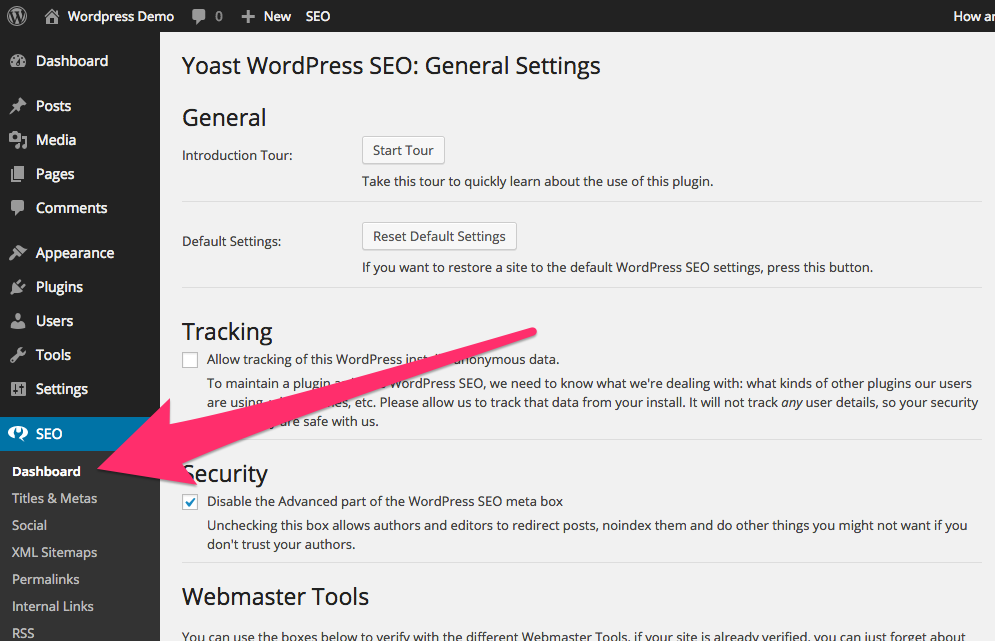
You can also adjust some tracking and security options if you need to (the defaults are usually fine here, but do read the options’ descriptions to double-check).
Finally, on this General Settings view, you can add verification codes to verify your ownership of your site with Google and Bing’s Webmaster Tools, amongst others, if you haven’t done this already: 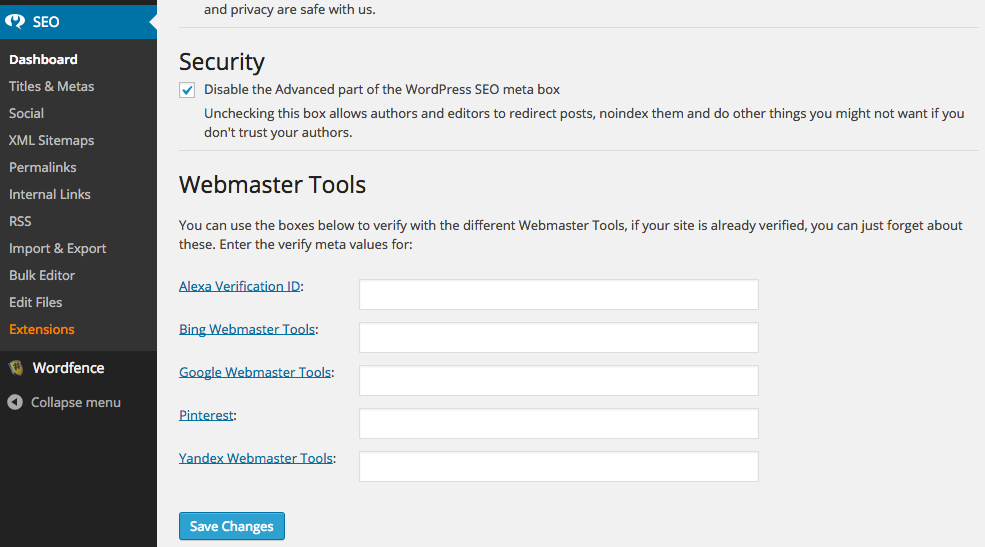
As well as General Settings, you can also click on ‘Titles & Metas’ to change the default settings for title tags and meta descriptions.
However, you can also change the title tag and meta description for each page and post on your site individually, so you may not need to change many of these site-wide default settings.
You can also edit all of the title tags and meta descriptions for all the pages and posts on your site using the ‘Bulk Editor’ section of the SEO plugin’s options:
It’s a good idea to click on the ‘Other’ tab at the top of the Titles & Metas settings view in order to check the ‘Disable the author archives’ and ‘Disable the date-based archives’ checkboxes, since these archive pages could be misinterpreted by search engines as duplicate versions of your homepage:
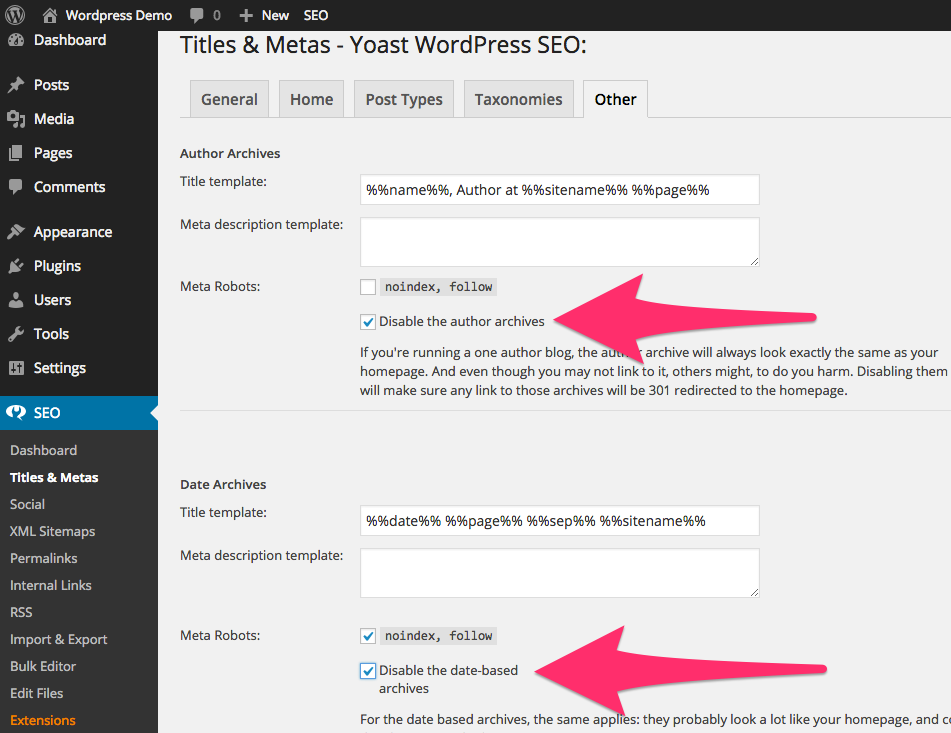
Remember to scroll down and click ‘Save changes’ before you leave this page!
Using the Wordpress SEO by Yoast Plugin When Creating Posts and Pages
Once the Wordpress SEO by Yoast plugin is installed and activated, you will see a new ‘Wordpress SEO by Yoast’ options box on any Add New Post/Page or Edit Post/Page view:
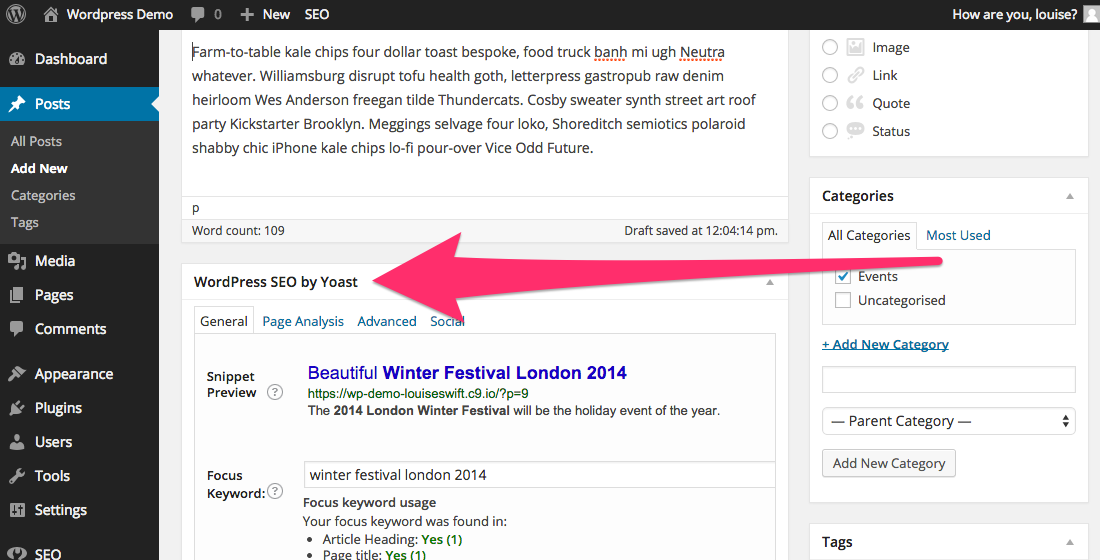
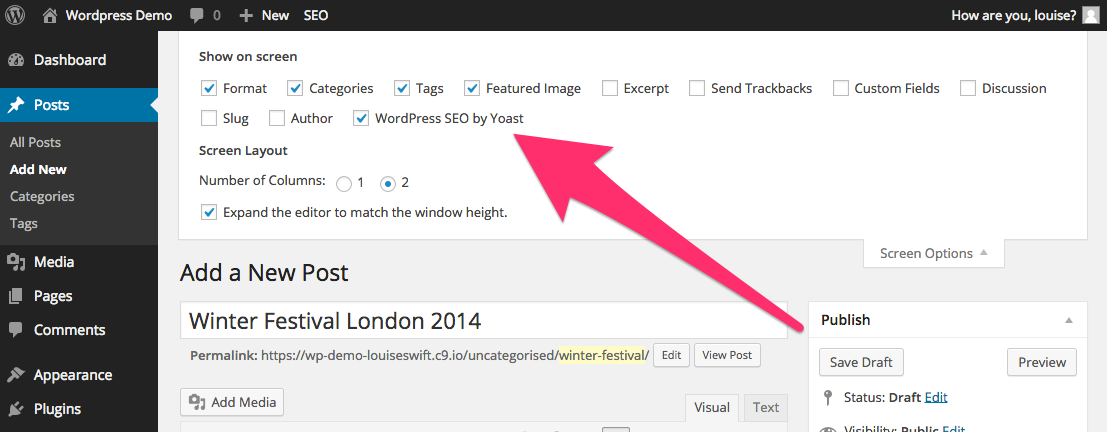
If you don’t see this options box, double-check that you do have the Yoast SEO plugin activated and installed - read the previous section of this article for help on that if needed. Alternatively, you may need to check the ‘Screen Options’ dropdown at the top of the post/page editing view to see whether the Yoast SEO options panel is enabled or not:
The top section of the options box, under the ‘General’ tab, shows you a snippet preview which will update when you enter information into the ‘SEO Title’ and ‘Meta Description’ fields below.
The first field underneath the snippet preview, however, is where you enter your chosen focus keyword for this page or post. When you start to enter a keyword, a dropdown will appear (perhaps after a few seconds) with additional suggestions:

These are based on Google’s autocomplete suggestions. You can also use Yoast’s keyword suggest tool to research even more keywords.
Read more about choosing the right focus keyword here.
Fill in the next two boxes, ‘SEO Title’ and ‘Meta Description’, with keyword-containing content that makes your page snippet (shown in the ‘Snippet Preview’ area just above) look appealing. You want to beat your competition in the search results listings, remember, so write words that will get a human’s attention rather than worrying too much about putting keywords in perfectly.
Once you’ve completed these fields, click ‘Save Draft’ in the top-right corner of this view to get your SEO score:
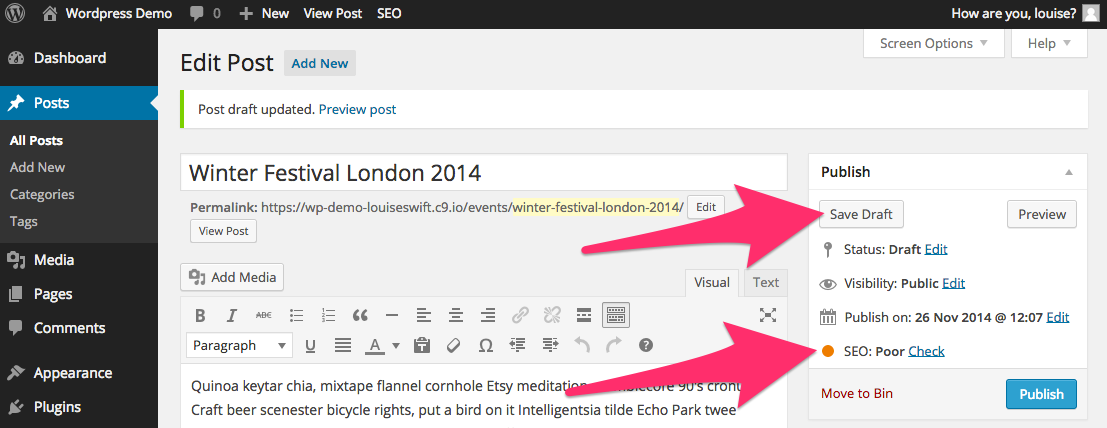
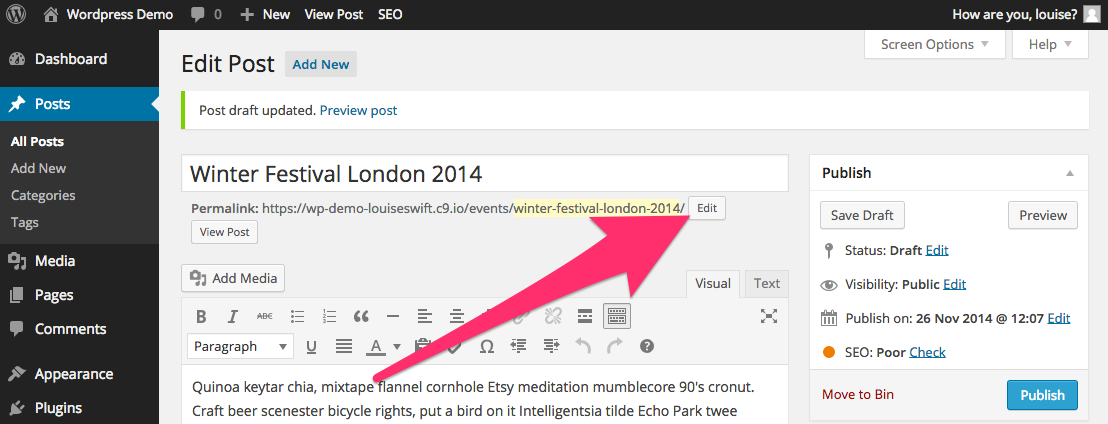
If you need to update the page’s URL to include some keywords, scroll up to the top of the Add New Post/Page or Edit Post/Page view and click ‘Edit’, just under the post or page’s title:
If, even after putting your keywords into your page’s title, content, URL, title tag and description tag, you still need to improve your SEO score to get the ‘green circle’, take a look at the ‘Page Analysis’ tab of the Yoast SEO options area:
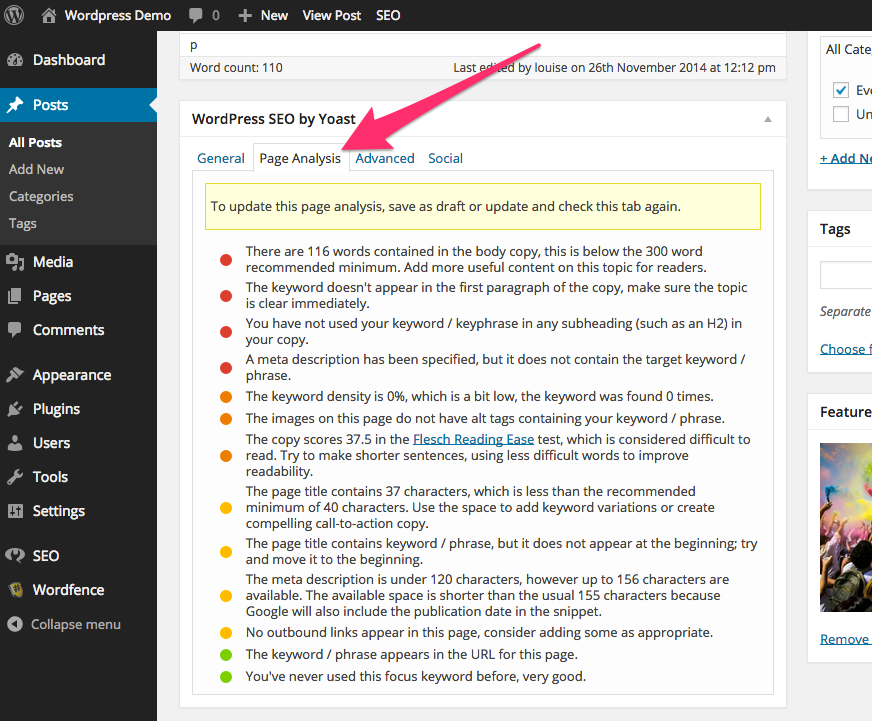
As you can see, there are lots of extra guidelines and suggestions there to tackle.
Congratulations! You’ve installed, set up and started using the Wordpress SEO by Yoast plugin.
Remember to fill in all the extra SEO-related data every time you create a new post or page, and to register for Google’s Webmaster Tools so that you can track how your site is performing in the search results over time.
Any extra questions? Email us or ask in the comments below.