
Jump to:
If you're new to WordPress theme customisation, you may not yet be aware that the safest and easiest way to do this customisation is to use a child theme.
You probably know about how WordPress themes can be added or removed from your site and, if added, activated to change the way your site looks.
And you may have already spotted the 'Editor' section of the WordPress Dashboard area (under the 'Appearance' menu item), where you can see your current theme's code.
But it's not a good idea to make edits to your theme here. If you make changes to this code, you're editing the theme directly. And if that theme is later updated? Your edits are overwritten.
Plus, what about if you make a mistake editing the code here? It's not a very user-friendly environment to edit code in, so mistakes can be easily made (and very hard to find or fix).
Fortunately, there's a simple solution to these problems. Yes—creating a child theme!
As you can tell by their name, child themes are 'related' to parent themes. A child theme inherits most of its code from their parent theme, in fact.
The only new code in a child theme is the code that you want to overwrite from the parent theme. If the parent theme includes a footer that says, "Proudly powered by WordPress", then you can create a new footer file that overwrites that text. But you don't need to create a new header file if you don't want to overwrite the parent theme's header.
This means theme customisation using a child theme can be very speedy. You don't need to write all the theme code from scratch. Let the child theme inherit most of the code, and only write some new code to overwrite the parent theme's code.
Sounds great! Let's get started with creating our first WordPress child theme.
The official WordPress documentation contains information on how to do this, by the way, but it's written in quite a confusing way. So these steps have been simplified and I've included some helpful screenshots.
To make your theme customisation learning process even safer, please make sure you have set up a separate WordPress site for practicing on. Read our article on how to do that here.
Now you're ready to create your first child theme.
Step 1: Create your child theme's directory
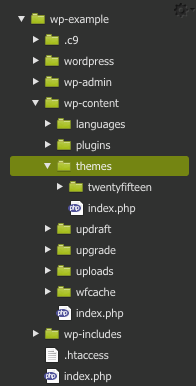
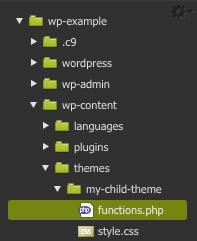
Within your WordPress website's files and folders, you'll need to locate the 'themes' folder. It can be found under 'wp-content', as shown in the screenshot below.
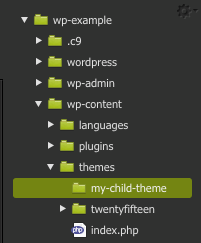
Create a new folder inside 'themes', called 'my-child-theme'.
Step 2: Create child theme's main CSS file
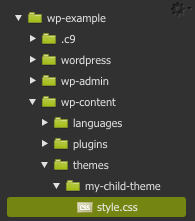
There are two important files to create inside the 'my-child-theme' folder. The first is 'style.css'. Create that file now.
Open up 'style.css' and write the following lines of code there:
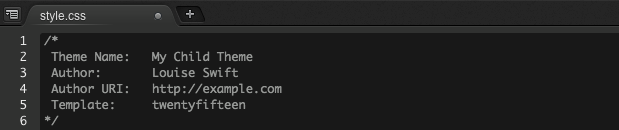
Notice the line that begins Template:. This is where we're telling WordPress that our new theme is a child of (in this case) the Twenty Fifteen theme.
The value written in the Template: line should be exactly the name of the parent theme's folder.
Step 3: Create child theme's functions file
The other important file to include in a new child theme is the 'functions.php' file.
Create that file now.
Add the following lines of code to functions.php:
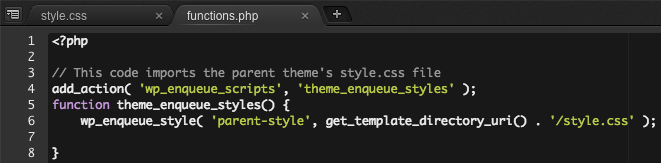
These lines of code are simply importing the parent theme's style.css file into your theme. This means your child theme will look identical to the parent theme (for now).
To check that your new child theme is working, login to your WordPress testing site's Dashboard and go to 'Appearance' -> 'Themes'.
Select your new child theme and activate it.
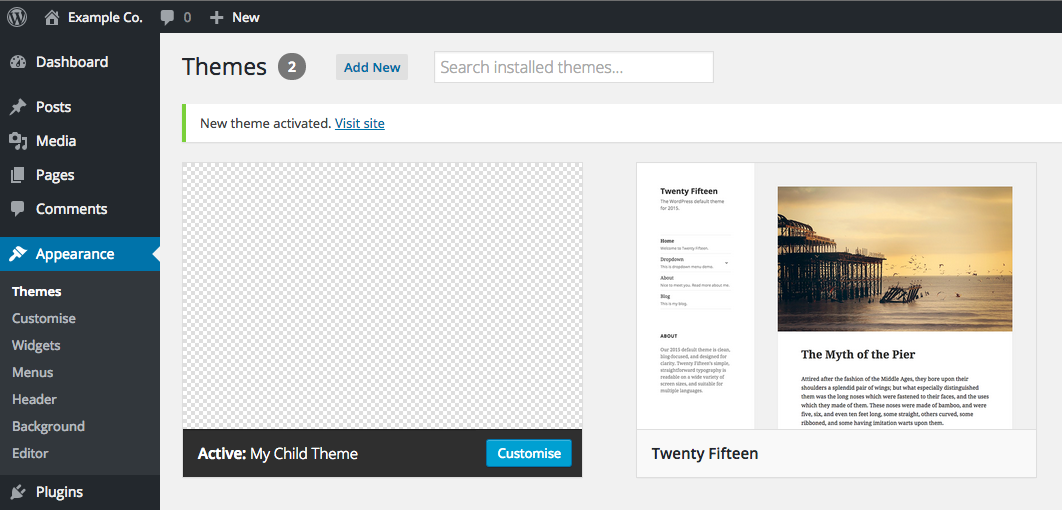
Then visit the front view of your site to see that your new child theme looks identical to the Twenty Fifteen theme. That's good! Next, we'll look at how to start making some changes.
Step 4: Change some text colours using your new CSS file
In your child theme's style.css file, add the following lines of CSS code below the lines you wrote in Step 2:

Now save this file and go back to the browser tab in which you're viewng the front of your site. Press F5 to refresh the page.
The main 'body'/paragraph text is now red. This probably isn't what you want for your site, but now we know that our child theme is working correctly.
Instead of turning body text red, you could change the body's background colour or make the links turn blue when hovered. All you need to do is use normal CSS code.
Step 5: Change the footer text by creating a new footer template file
The easiest way to make small edits to your theme is to copy the template file from the parent theme's folder into your child theme's folder.
Then you can open up this new template file and make changes to the code in there. When it's saved, this child theme template file will be used instead of the parent theme template file. So your changes will show on your site.
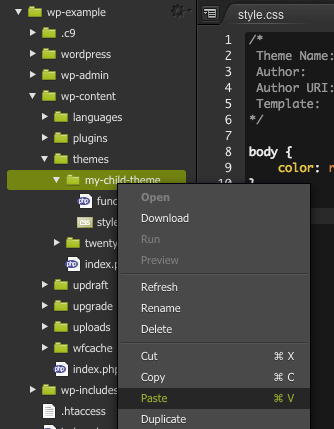
Open the 'twentyfiften' theme folder, right-click on the 'footer.php' file in there and choose 'Copy'.
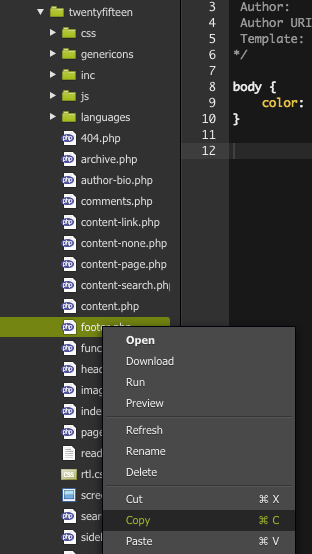
Now go back to your 'my-child-theme' folder and right-click to 'Paste' the footer.php file in there.
Open up footer.php and look for this line of code (it should be on line 25):

Change it to:

Now save and go back to the browser tab in which you're viewing the front of your site. Press F5 to refresh the page, and scroll down to see your new footer text.
Step 6: Change the font by creating a new header template file
Repeat the first few instructions from Step 5 in order to copy your parent theme's 'header.php' file into your child theme's folder.
Open up your new header.php file and make a new line underneath line 17.
Copy & paste the following line of code into the new, empty line:
<link href='http://fonts.googleapis.com/css?family=Raleway:400,700' rel='stylesheet' type='text/css'>
Now save this file and open up your child theme's style.css file. Add the following lines of code to it:

Now save this file, too, and refresh the front view of your website. Notice the new font. You can use any Google Webfont for free on your site, so visit the Google Webfont repository to find fonts that you like.
Happy child theming! Let us know if you have any questions or comments about child themes.